SODAQ ExpLoRer
In this tutorial you’re going to program the SODAQ ExpLoRer board using the Aurduino IDE. Follow this guide to program the SODAQ Explorer board and connect it to the The Thinks Network (TTN)
Important You must be within range of The Things Network coverage area or gateway. You can see the The Things Network Coverage Map to check coverage in your area or install your own LoRaWAN gateway connected to The Things Network. If you are not within The Things Network coverage area your device will not connect and transmit data to the The Things Network platform.
Linux Requirement
This applies to Linux ONLY Linux Users you may need to give your current user read/write access to the serial device file. This usually requires you to add the current user to a system group. These group names vary depending on the Linux distro that you’re using. Here are some examples for Ubuntu & Arch Linux.
Ubuntu Serial Access run this command in a terminal and REBOOT the machine
sudo usermod -a -G dialout $USER
Arch Linux Serial Access run this command in a terminal and REBOOT the machine
gpasswd -a $USER uucp
gpasswd -a $USER lock
Arduino Desktop IDE
- Download & Install the Arduino Desktop IDE
Configure Arduino for the SODAQ ExpLoRer Libraries
- Open Arduino IDE
- Click
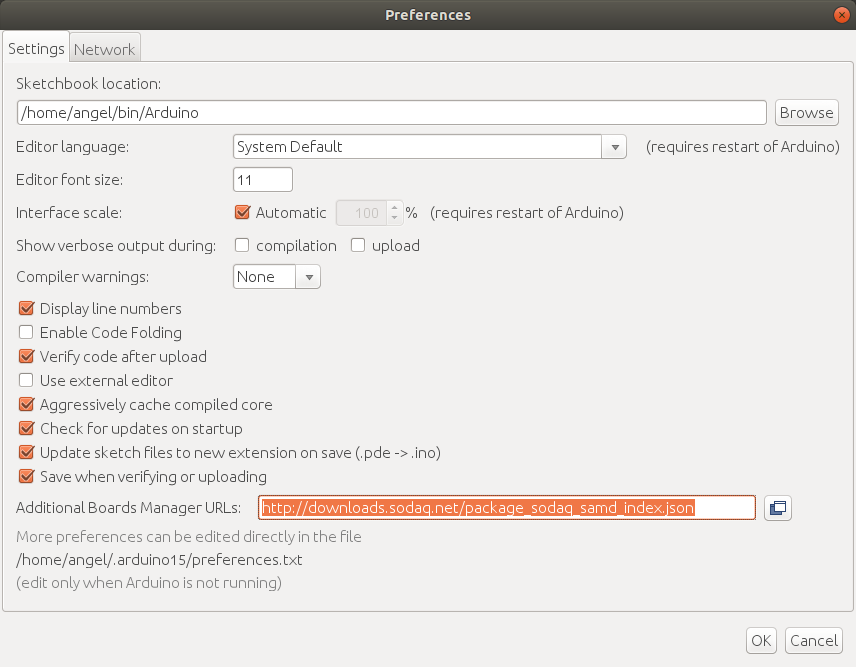
File>Preferences -
In the
Additional Boards Manager URLsfield enter this url to set the SODAQ Explorer board’s librarieshttp://downloads.sodaq.net/package_sodaq_samd_index.json - Click
OK
Install Arduino the SODAQ Explorer Libraries via Board Manager
- Click
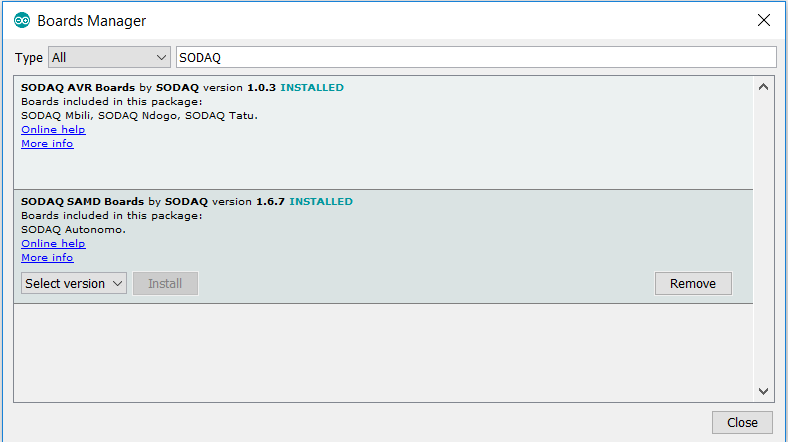
Tools>Board>Boards Manager - Type
SODAQin the filter text field - Click the
Installbuttons for each of the SODAQ devices listed
Install The Things Network Arduino Libraries
Install the TTN arduino device libraries
- Click
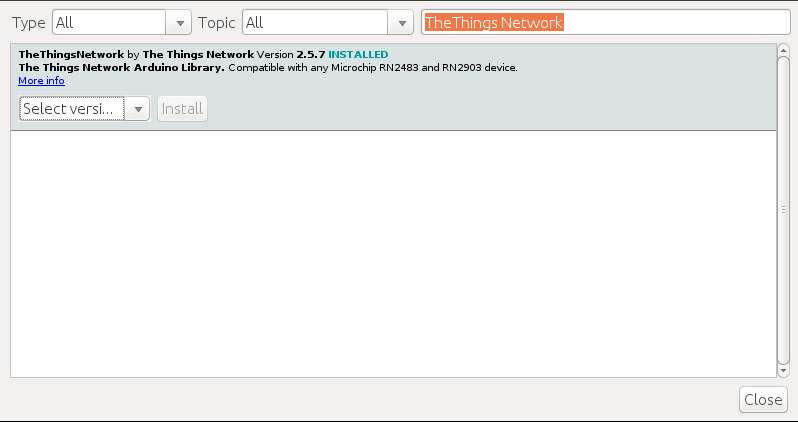
Sketch>Include Library>Manage Libraries - Type
The Things Networkin the filter text field - Click the install button in the
The Things Network Arduino Librarysection
You can learn more about the TTN Arduino Library from the project’s github repo here
Install the Cayenne Low Power Payload (LPP) Libraries
Install the Cayenne LPP library in the Arduino IDE.
- Click
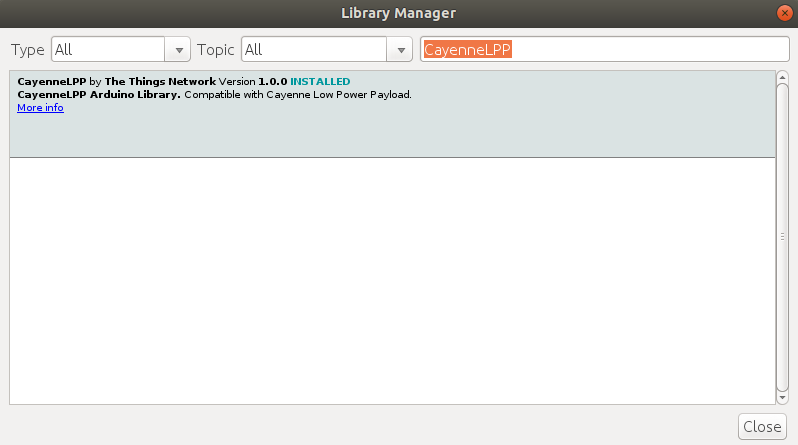
Sketch>Include Library>Manage Libraries - Type
CayanneLPPin the filter text field - Click the install button in the
CayenneLPP Arduino Librarysection
Learn more about Cayenne LPP here
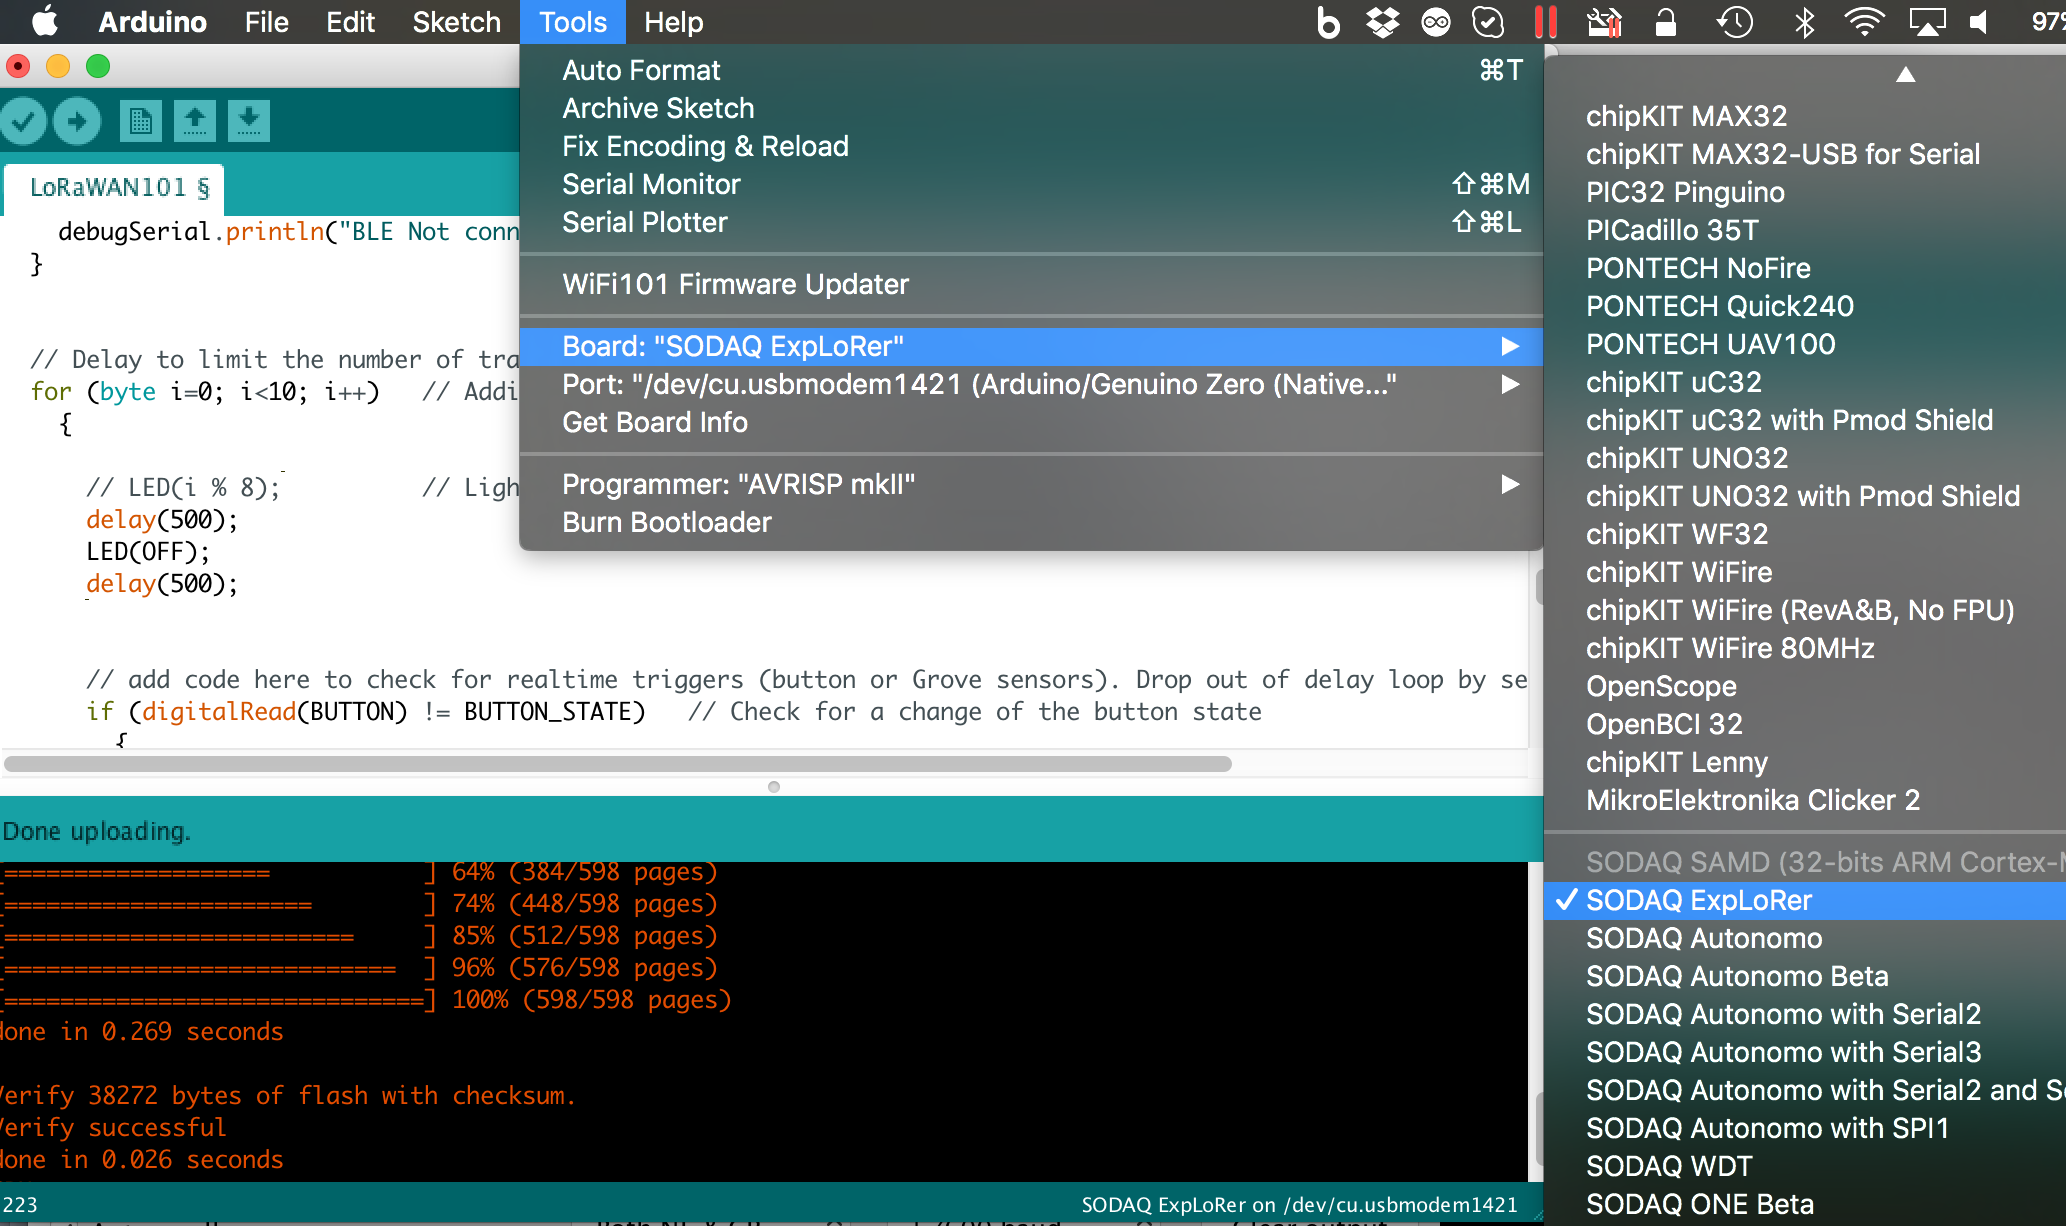
Select the SODAQ Explorer Board
- Click
Tools>Board>Boards Managerscroll down the menu find & click on theSODAQ Exploreroption in the list
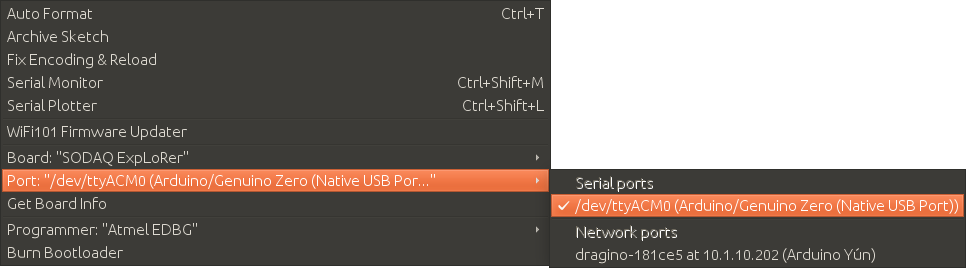
Setup the Arduino Serial Port
The Serial Monitor enables you to interact, log & debug applications on connected devices. You will be using the Serial Monitor to get information from the connected device. At this point connect the micros usb to the device then to the computer. Next select the serial port in Arduino IDE.
Note The actual Port Names will vary between different Operating Systems. The screenshots below are from the Ubuntu OS.
- Click
Tools>Ports:> Select theUSBport which should correspond to the connected device.
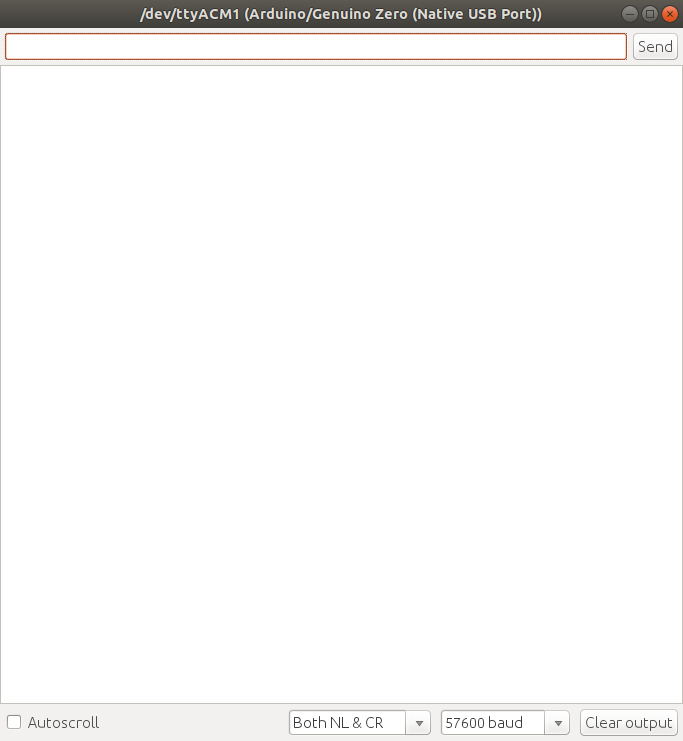
LoRaWAN requires information specific to individual devices in order for them to connect & function on LoRaWAN networks. You will use the Arduino Serial Monitor to get the device information that is required to register on The Things Network servers later in this tutorial.
- Click
Tools>Serial Monitora window will open (Make sure your device is connected & you selected the correctUSB Port)
TTN SODAQ ExpLoRer Arduino Sketch/Code
The arduino platform maintains it’s source code in sketches which are files with a .ino extension. The code that we’re using for this tutorial can be found in the github repo https://github.com/microshare/hackiot_examples
- Download or Clone the examples repo so that you have the source code locally
- Click
File>Openbrowse to the location where you cloned the repo and open thehackiot_examples/ttn_sodaq_hackiot_reading/ttn_sodaq_hackiot_reading.inofile
You should see the codebase that we’ll be using for this tutorial in the IDE. In order to properly register & connect the device to TTN we will need some information from the SODAQ board such as the board’s DevEUI. Now you’ll compile & upload this example app to the SODAQ board via the ide. This example code will not function at this point because we’re missing keys for the TTN. In the next steps we’ll get the information from the device that’s required for registration on the TTN.
- Click the
Sketch>Upload
The application will be compiled and uploaded to the SODAQ board. You should see some similar success messages in the IDE’s terminal section.
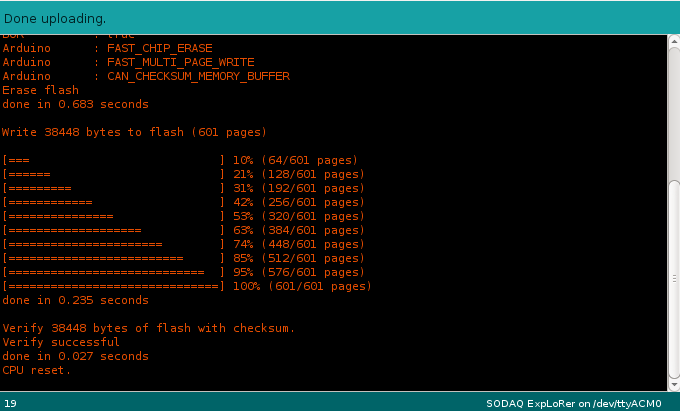
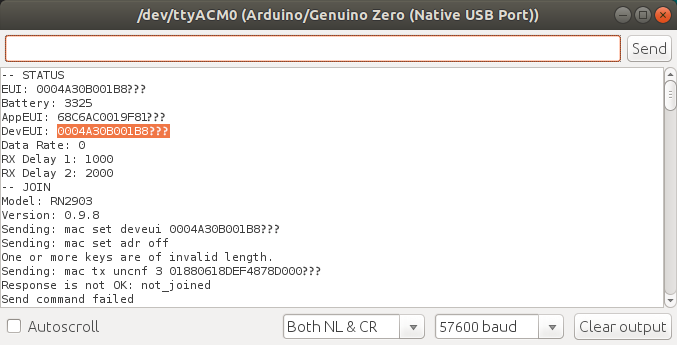
In the Serial Monitor window you should start seeing information scrolling. Un-check the Auto Scroll check box to stop the auto scrolling. Manually scroll to the top of the Serial Monitor and record or copy the DevEUI value listed
Now that you have the DevEUI value for your device you can begin registering and connecting your device to The Things Network. The next section shows you how to register and connect your SODAQ device to TTN using LoRaWAN.
Register a The Things Network Account
If you don’t have a TTN account go over to the The Things Network website and register for an account. After registering and logging into your TTN account go to the TTN Console Dashboard
TTN Console
In this console you’ll need to create a new TTN Application which is essentially a container on the TTN platform and where you’ll register/associate your SODAQ board.
- Go to the TTN Console Dashboard
- Click
Applications - Click
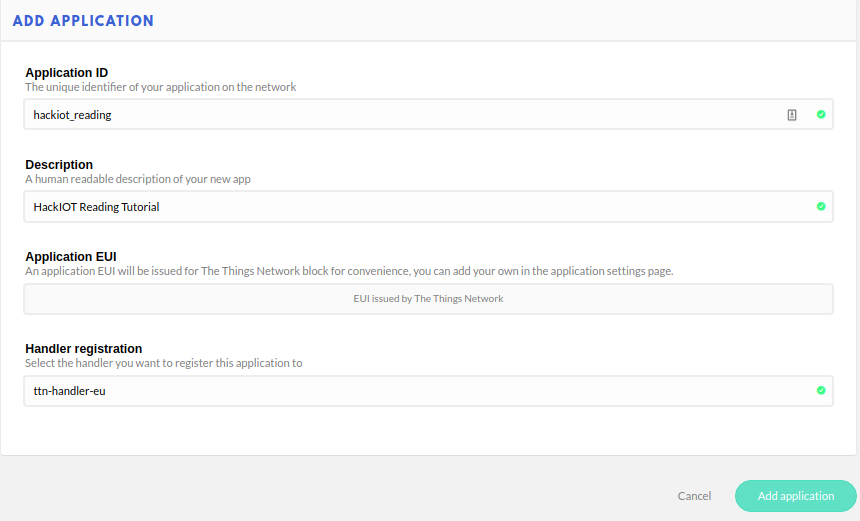
Add Application - Enter a name for your Application. You can enter whatever you like here.
- Enter a description for your app
- Select the appropriate Handler from the list. These are based on the location your device will operate from.
- Europe:
ttn-handler-eu - USA:
ttn-handler-us-west - Asia:
ttn-handler-asia-se
- Europe:
TTN Set Application Payload Format - CayenneLPP
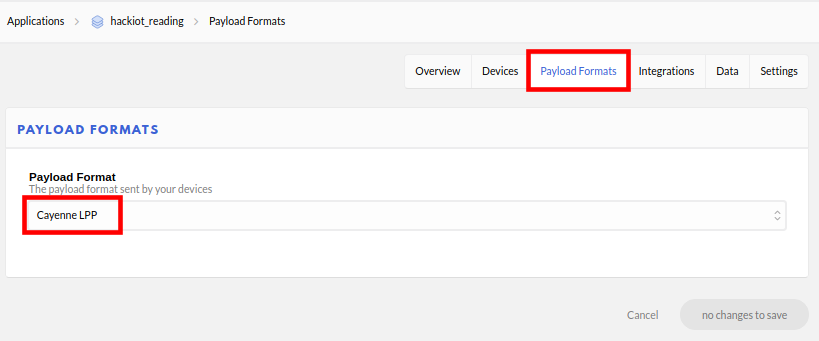
The Cayenne Low Power Payload (LPP) provides a convenient and easy way to send data over LPWAN networks such as LoRaWAN. The data transmitted to TTN is formatted using LPP and you must configure your newly created TTN Application to decode the data.
- Click the
Payloads FormatsTab - Select >
Cayenne LPPin the dropdown box - Click
Savebutton
TTN Register a Device
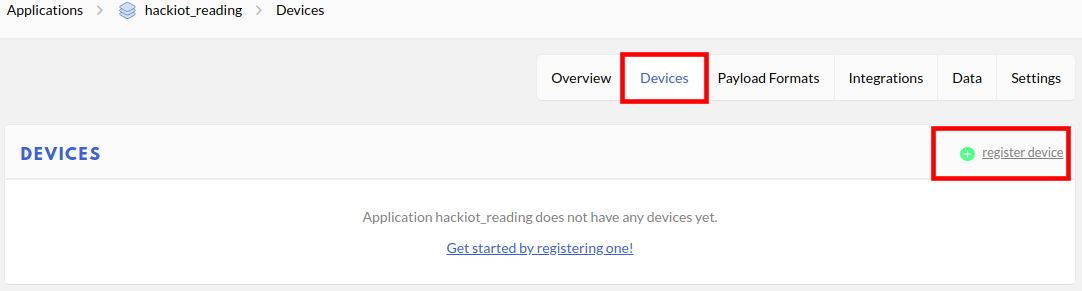
Now that you have created a new application we need to register a new device to the app which will provide the information you’ll need to program the SODAQ board and connect it to TTN via LoRaWAN.
- Click the
Device Tab - Click
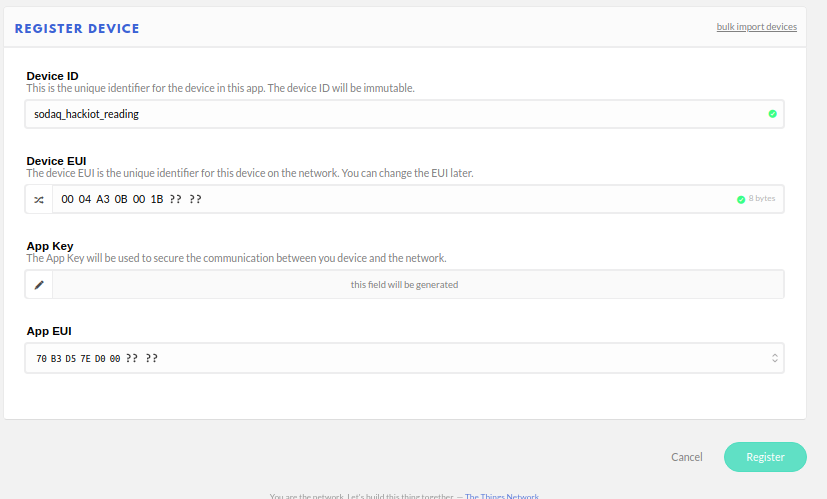
Register Device
- Device ID: Enter a name for your device (this name is permanent and can not be changed after created)
- DeviceEUI: Enter the
DevEUIfor your device that you recorded in previous steps from the Serial Monitor. - Click the
Registerbutton
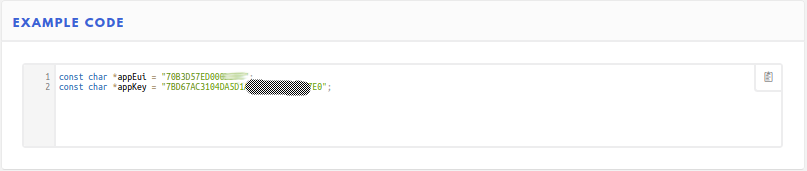
After Clicking the Register button you will be redirected to the Device Overview console. Scroll down the Example Code section at the bottom of the page. There you will see variable definitions for the appEUI and appKey parameters. Copy these values, you’re going to need them when programming the SODAQ board. These values are used by TTN to identify and secure the data flowing between the device and TTN.
Program the Device
You now have all the information you need to program the SODAQ board to connect and transmit data to TTN. In this section you’ll update the ttn_sodaq_hackiot_reading.ino code with the latest values
- Connect the device via USB to your computer
- Open the
ttn_sodaq_hackiot_reading.inofile in Arduino IDE
Replace the values of these variables:
const char *appEui= “< Enter yourappEUIvalue from TTN >”;const char *appKey= “< Enter yourappKeyvalue from TTN >”;
Ensure that you specify the correct LoRa frequency for your location.
Europe: TTN_FP_EU868
USA: TTN_FP_US915
- #define freqPlan
TTN_FP_EU86
Your code is now ready to be compiled and uploaded to the device.
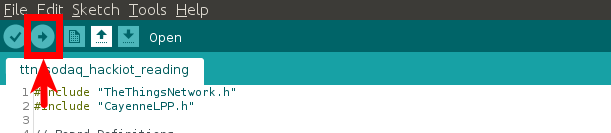
In the Arduino IDE:
-Click File > Upload or click the Upload toolbar button
The Arduino IDE’s console shows the status of the compilation and upload of the application to the device. Use the Serial Monitor in the Arduino IDE to view the devices activity & connection status to TTN platform.
Congratulations! The device is now running the code that you compiled. Next we’ll check the TTN dashboard to see actual LoRaWAN traffic being collected from your device.
Confirm the Device is Transmitting to The Things Network
Log into the TTN Portal and navigate to your TTN application and find your registered device. If the device is transmitting properly then you will see data in the TTN device portal within a few minutes as shown below.

Your device is now programmed to read and transmit it’s sensor data to the TTN platform for processing.
Stream IoT packets from Senet to Microshare
Follow this The Things Network (TTN) tutorial to set up a redirection of IoT packets to the Microshare platform.