Rules Guide
Comprehensive guide to understand rules

SUMMARY :
1. What is a Rule?
A Rule is a concrete expression of a sharing policy. It allows a data owner to set the conditions in which a requested operation will be granted. Rules only allow sharing. Rules do not prevent sharing. Sharing is blocked by default.
2. Creating a Rule
Rules can be created via our API or through the Rule editor in the Composer Console. To get the the Rule editor, click “MANAGE” in the upper navigation panel. A horizontal panel will appear on the left-side of the page. Select the “Rules” panel navigator on the left to see a view of all of your defined Rules.
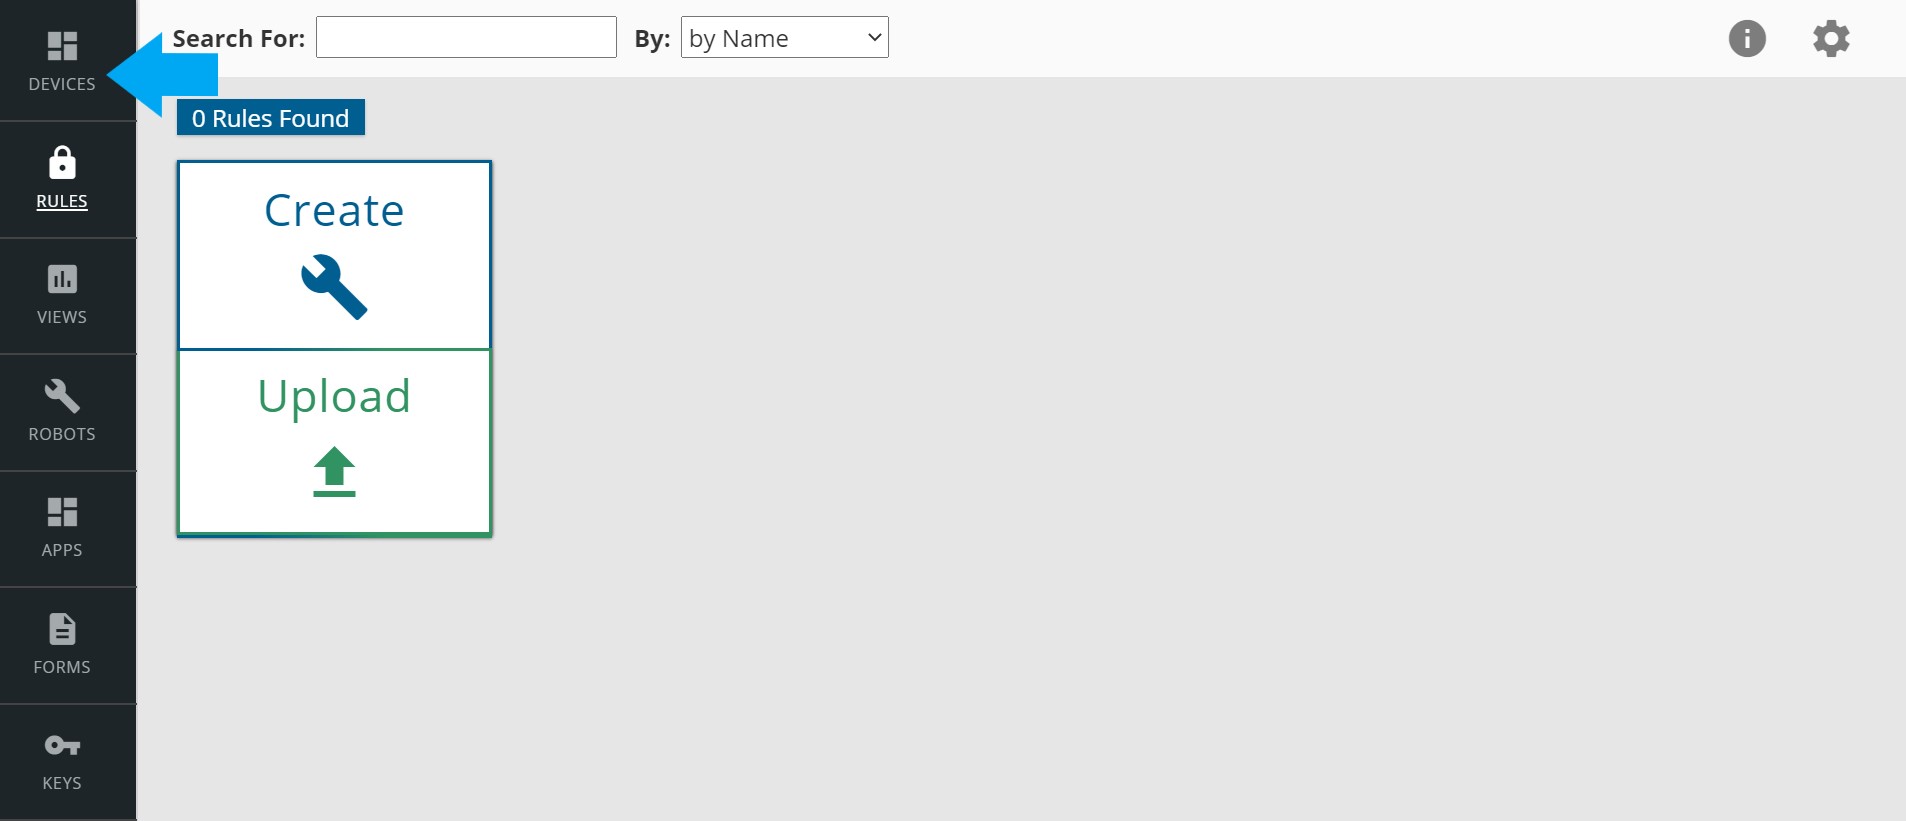
Click the “Create” button to navigate to the “Create Rule” page.
A. Create a name and description
The rest of this guide will work down the Rules page and describe the various functions found on this screen
The image below displays where the user can input the respective name and description of the rule they are making.

This ascribes a label and description to the Rule.
B. Record Identification
The image below displays where the user will determine what Record Type the Rule applies to

The Rule will allow select users to access the record type input here.
C. Operations
The image below displays where the user will determine what Operations are enabled by the Rule:

The Rule will allow select users to execute the Operations chosen here.
D. Owner Context
The image below displays where the user will determine who owns the Rule.
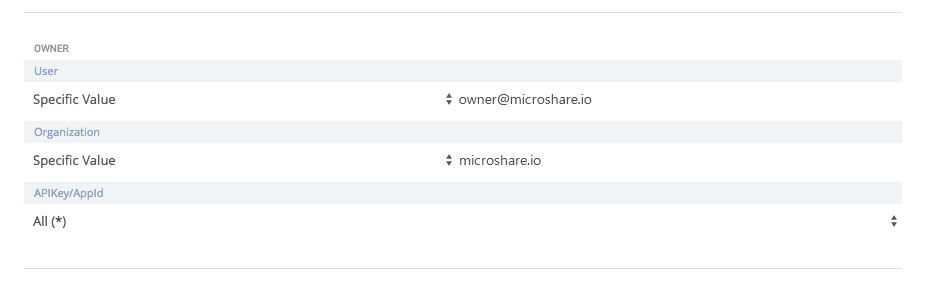
The rule can be owned by a specific users or to an organization. There are three dropdowns here:
- User - Set to the account of the user currently making the Rule.
- Orgnization - Set to the organization of the user currently making the Rule.
- APIKey/AppId - Can be set to “All (*)” to let all APIKeys associated with the user to own the Rule or “Specific Value” to allow a specific APIKey to own the Rule.
E. Requestor Context
The image below displays where the user will determine whom the Rule applies to:
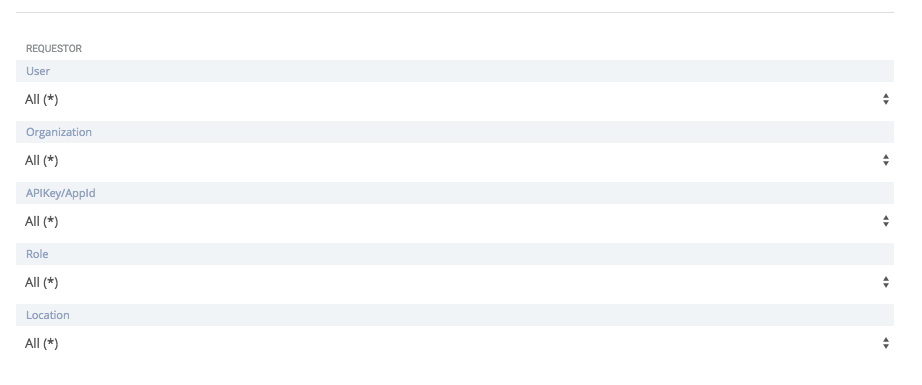
The User dropdown has three options:
1. All (*) - This will make the Rule apply to all users
2. Exact Match to Owner (=) - This will make the Rule apply only to the owner of the Rule
3. Specific Value - This will make the rule apply only to accounts entered here
The Organization dropdown has four options: (in the example my Organization domain is “io.myOrg.test”)
1. All (*) - This will make the Rule apply to all organizations. Any Organizations will have access to it.
2. Exact Match to Owner (=) - This will make the Rule only apply to the organization of the owner of the Rule. So if “io.myOrg.test” is sharing then only the people from “io.myOrg.test” will be able to access the elements.
3. Ancestor Organization (~) - This will make the Rule apply to the Ancestor Organization. If “io.myOrg.test” is sharing then anyone from “io.myOrg.test” can access the elements and also anyone from the upper Organization, so the people from “io.myOrg” can access the data.
4. Shared Ancestor Organization (&) - This rule will extend the previous one to other shared Organizations. It means that if “io.myOrg.test” is sharing then anyone from “io.myOrg.test” can access the elements and also anyone from the related Organization, so the people from “io.myOrg” can access the data but also “io.myOrg.dev” which is an Org that shares the same Ancestor Org.
5. Specific Value - This will make the rule apply only to the organization entered here.
The APIKey/AppId dropdown has three options:
1. All (*) - This will make the Rule apply to all APIKeys.
2. Exact Math to Owner (=) - This will make the Rule only apply in conjunction with an API key belonging to the owner of the Rule.
3. Specific Value - This will make the rule apply only to an APIKey entered here.
The Role dropdown has three options:
1. All (*) - This will make the Rule apply to all Roles.
2. Exact Match to Owner (=) - This will make the Rule apply to the same Role as the owner.
3. Specific Value - This will make the Rule apply only to the Role entered here.
The Location dropdown has two options:
1. All (*) - This will make the Rule apply to all Roles.
2. Ring-fence Polygon - Here a user can set a geographical area in which a Rule will apply to a user.
3. Simulating a Rule
Rule Simulation is a good way to explore the impact of different settings on Operation Grant outcomes.
When you are editing a Rule in the Composer Console, you will see a panel at the bottom of the Rule form labelled “Rule Simulation”. Interacting with this panel will not change the content of your Rule, so feel free to play-around to get the feel of how the tool works.
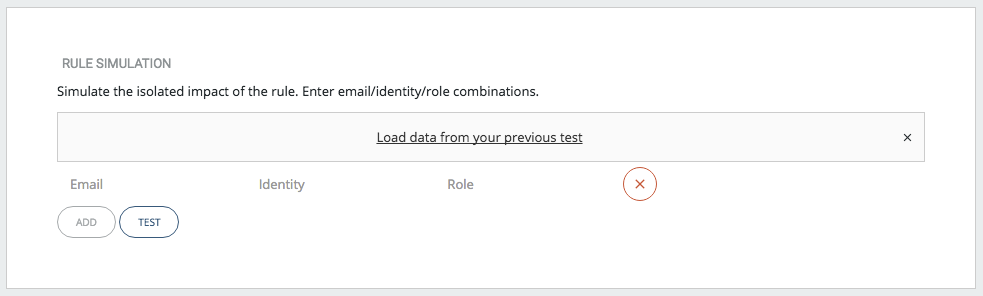
To start fill-in the first row with the details for a simulated requestor including email address, expected organizational identity, and role. Email is the only required field.
To add more rows to your simulation, click the “ADD” button. To remove a row, click the “X” button next to the row that you wish to remove.
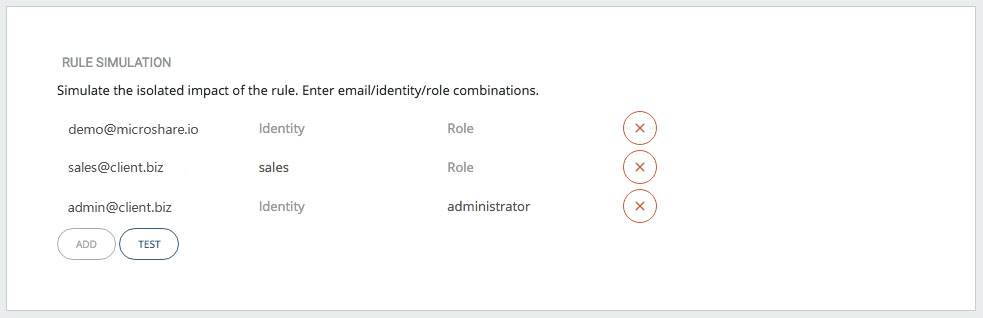
Click on the “TEST” button at any time to see a simulation of what your Rule would grant for each of the requestors in your list.
Once you have used the tool, your entries will be saved in your user preferences record. If you want to retrieve the last set of entries, click the link labeled “Load data from your previous test”. You can always edit the entries.
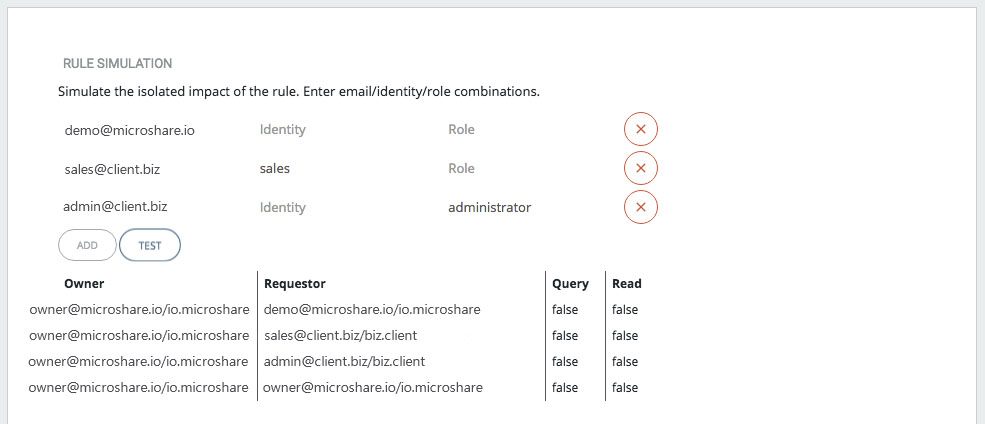
The result of the test will be a truth table showing the owner (you) and requestor (from your list) and the results for each operation governed by the Rule. The truth table only shows the results of the current Rule and does not take into account other Rules that may be active in the system.
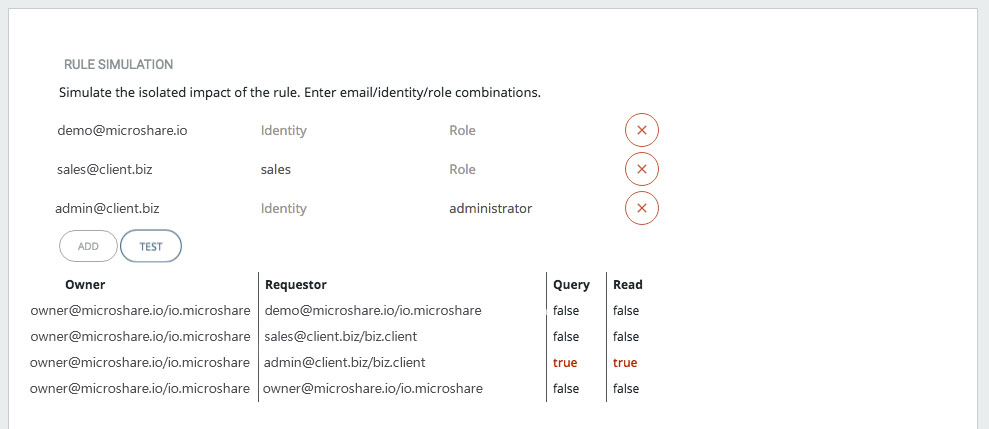
You can change the terms of your Rule and rerun your simulation at any time. The tool will highlight difference between each subsequent simulation to help you track the impact of changes you are making to the Rule terms. Changed outcomes will be in Red text.
4. Best Practices for Sharing Rules
When deciding to share data, it is always better to share less than share more. Yo can always create another rule that allows more access later on if requested.
Outline which parts of your data are essential and which are strictly for your eyes only. Share the bare essentials of the data that others need to learn from your sensors and refrain from sharing the sensitive data. The data in the grey area is up to you wether you grant others access to it. It may be best to withold the grey area data, and release it if multiple requests follow for access.
If you want to create an share an app that allows someone without a Microshare account to view your data, follow the Creating a Guest App Guide.