Registration
A comprehensive guide to installing devices with Deploy-M
SUMMARY
1. Overview
Deploy-M is a mobile application that streamlines the device configuration process. Use Deploy-M to configure all your devices to your Microshare account simultaneously, saving you time and ensuring an error- free installation of your digital twinning solution.
Get your Internet of Things data workflow started with the following steps
2. Requirements
To be able to use the Deploy-M application to configure your devices, make sure you have completed the following prerequisites.
To start, a Microshare account is required, either from our Production or Development platform. To create an account, follow this guide.
This account should have one or more “device clusters” to host the devices we will register with the application. To create a device cluster, follow this guide.
You are now ready to add devices to the Microshare platform. Devices obtained through Microshare will be labeled with Microshare QR codes, which will make configuration with the Deploy-M application easier, faster, and less error-prone.
3. Sign In
Now that all you are ready, let’s start!
1. Launch the Deploy-M application on your smartphone.
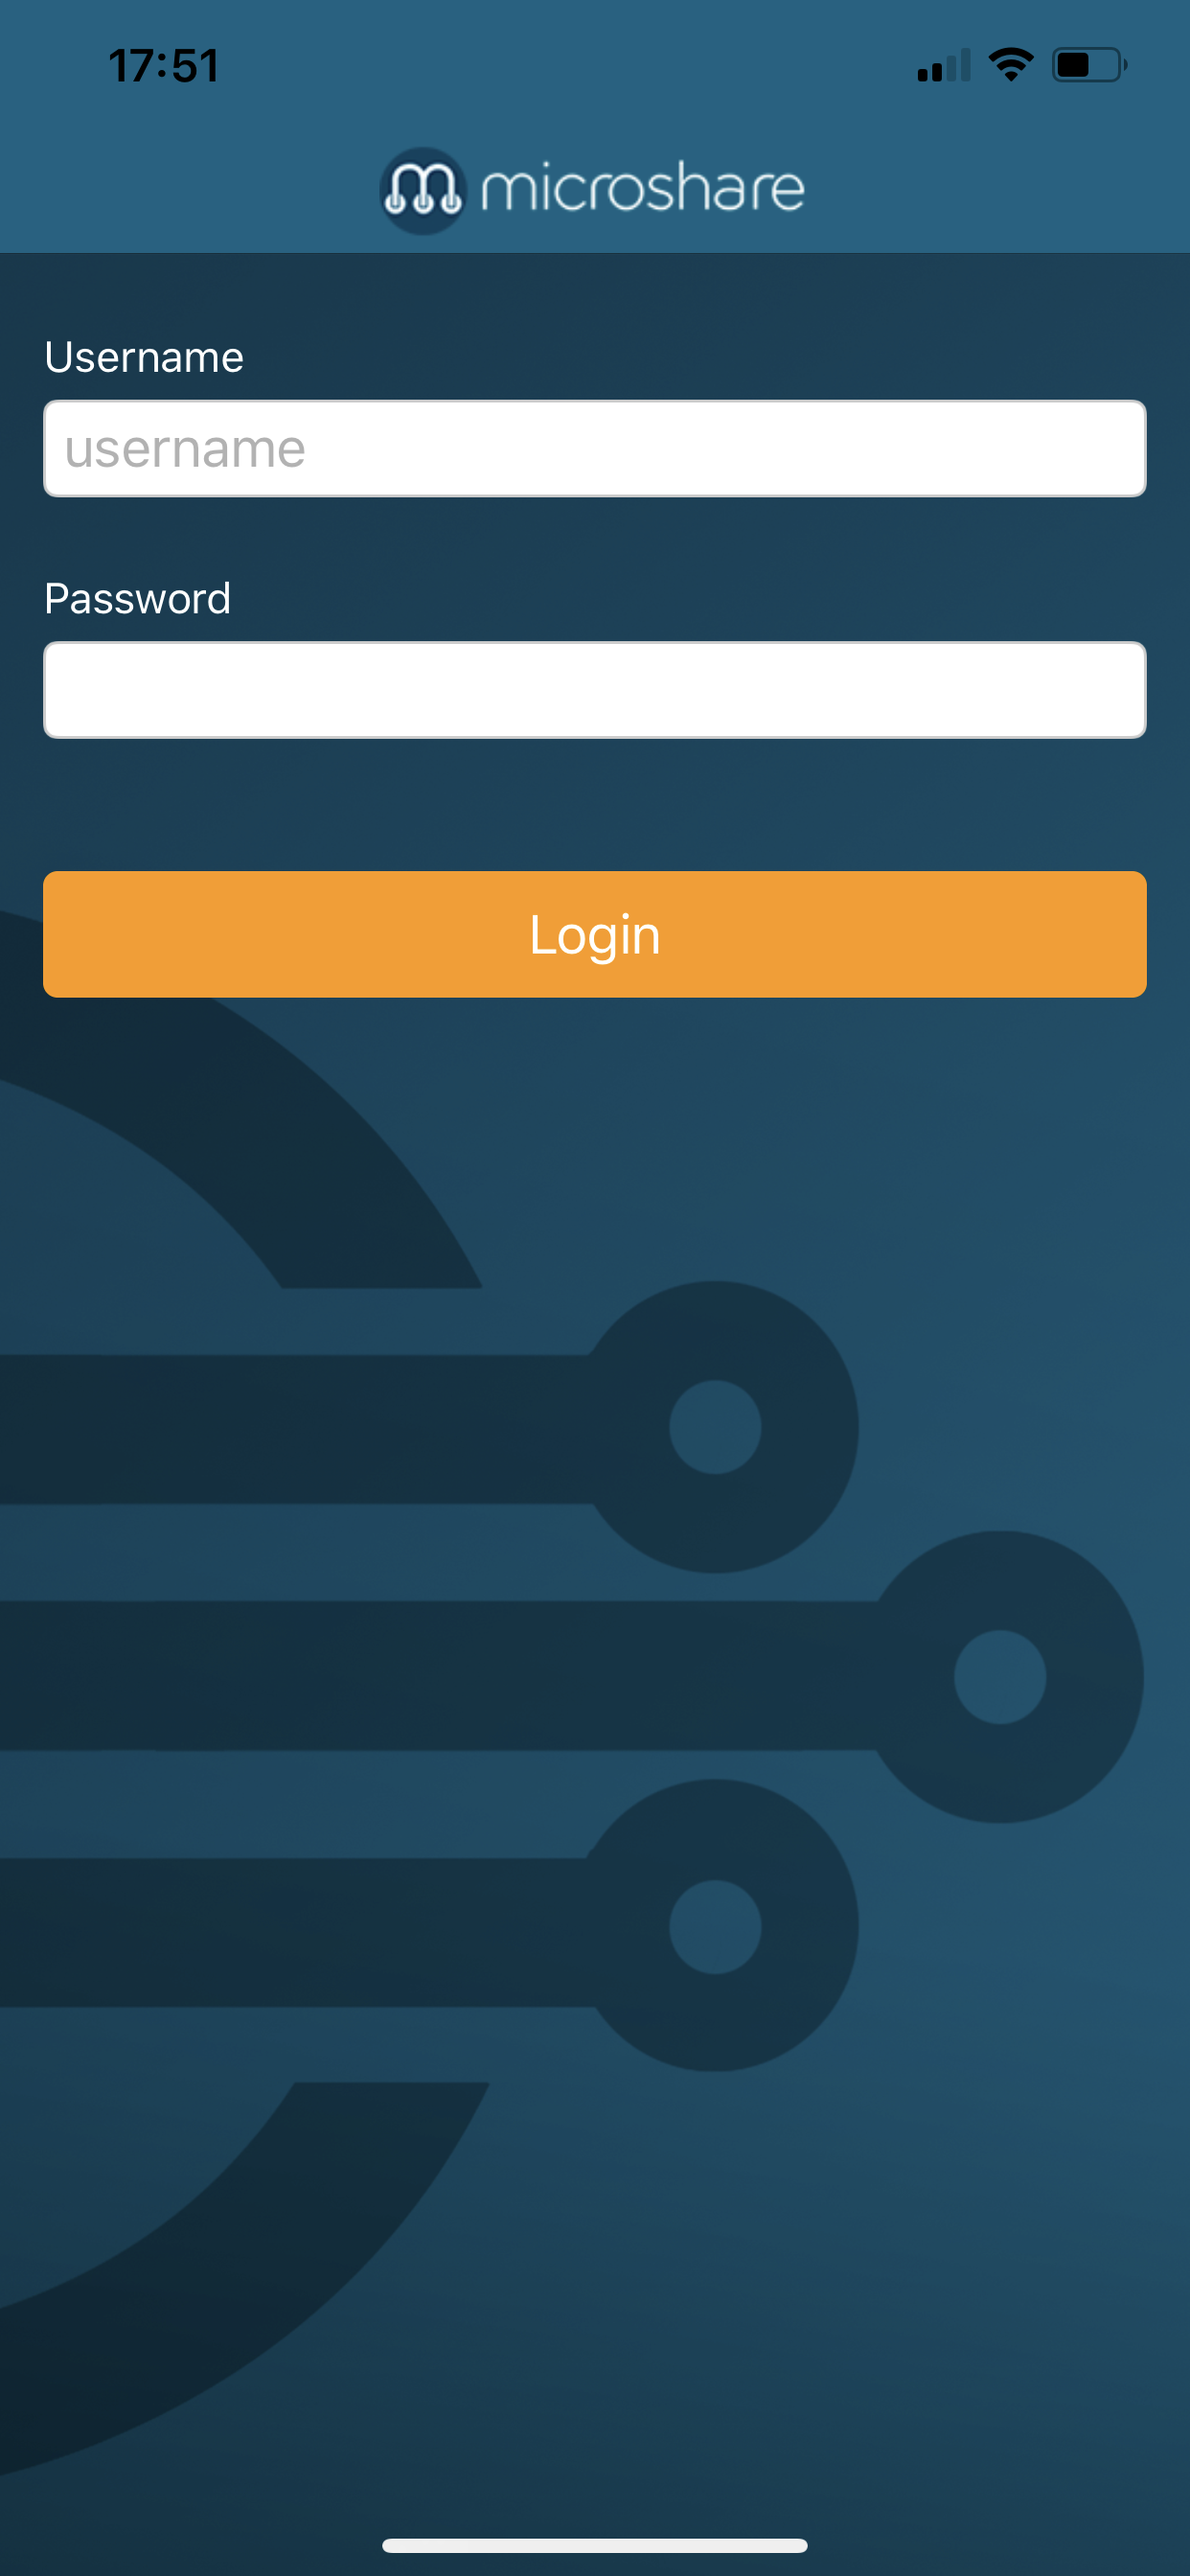
2. The first time you launch the application, you will be prompted to log in to the Microshare production server. Fill in your user credentials to log in.
You will arrive on the device cluster management page, where you will see the previously created device cluster(s).
NOTE: In order to use Microshare’s development server, first log in to the production server as above. Then go to the About page.
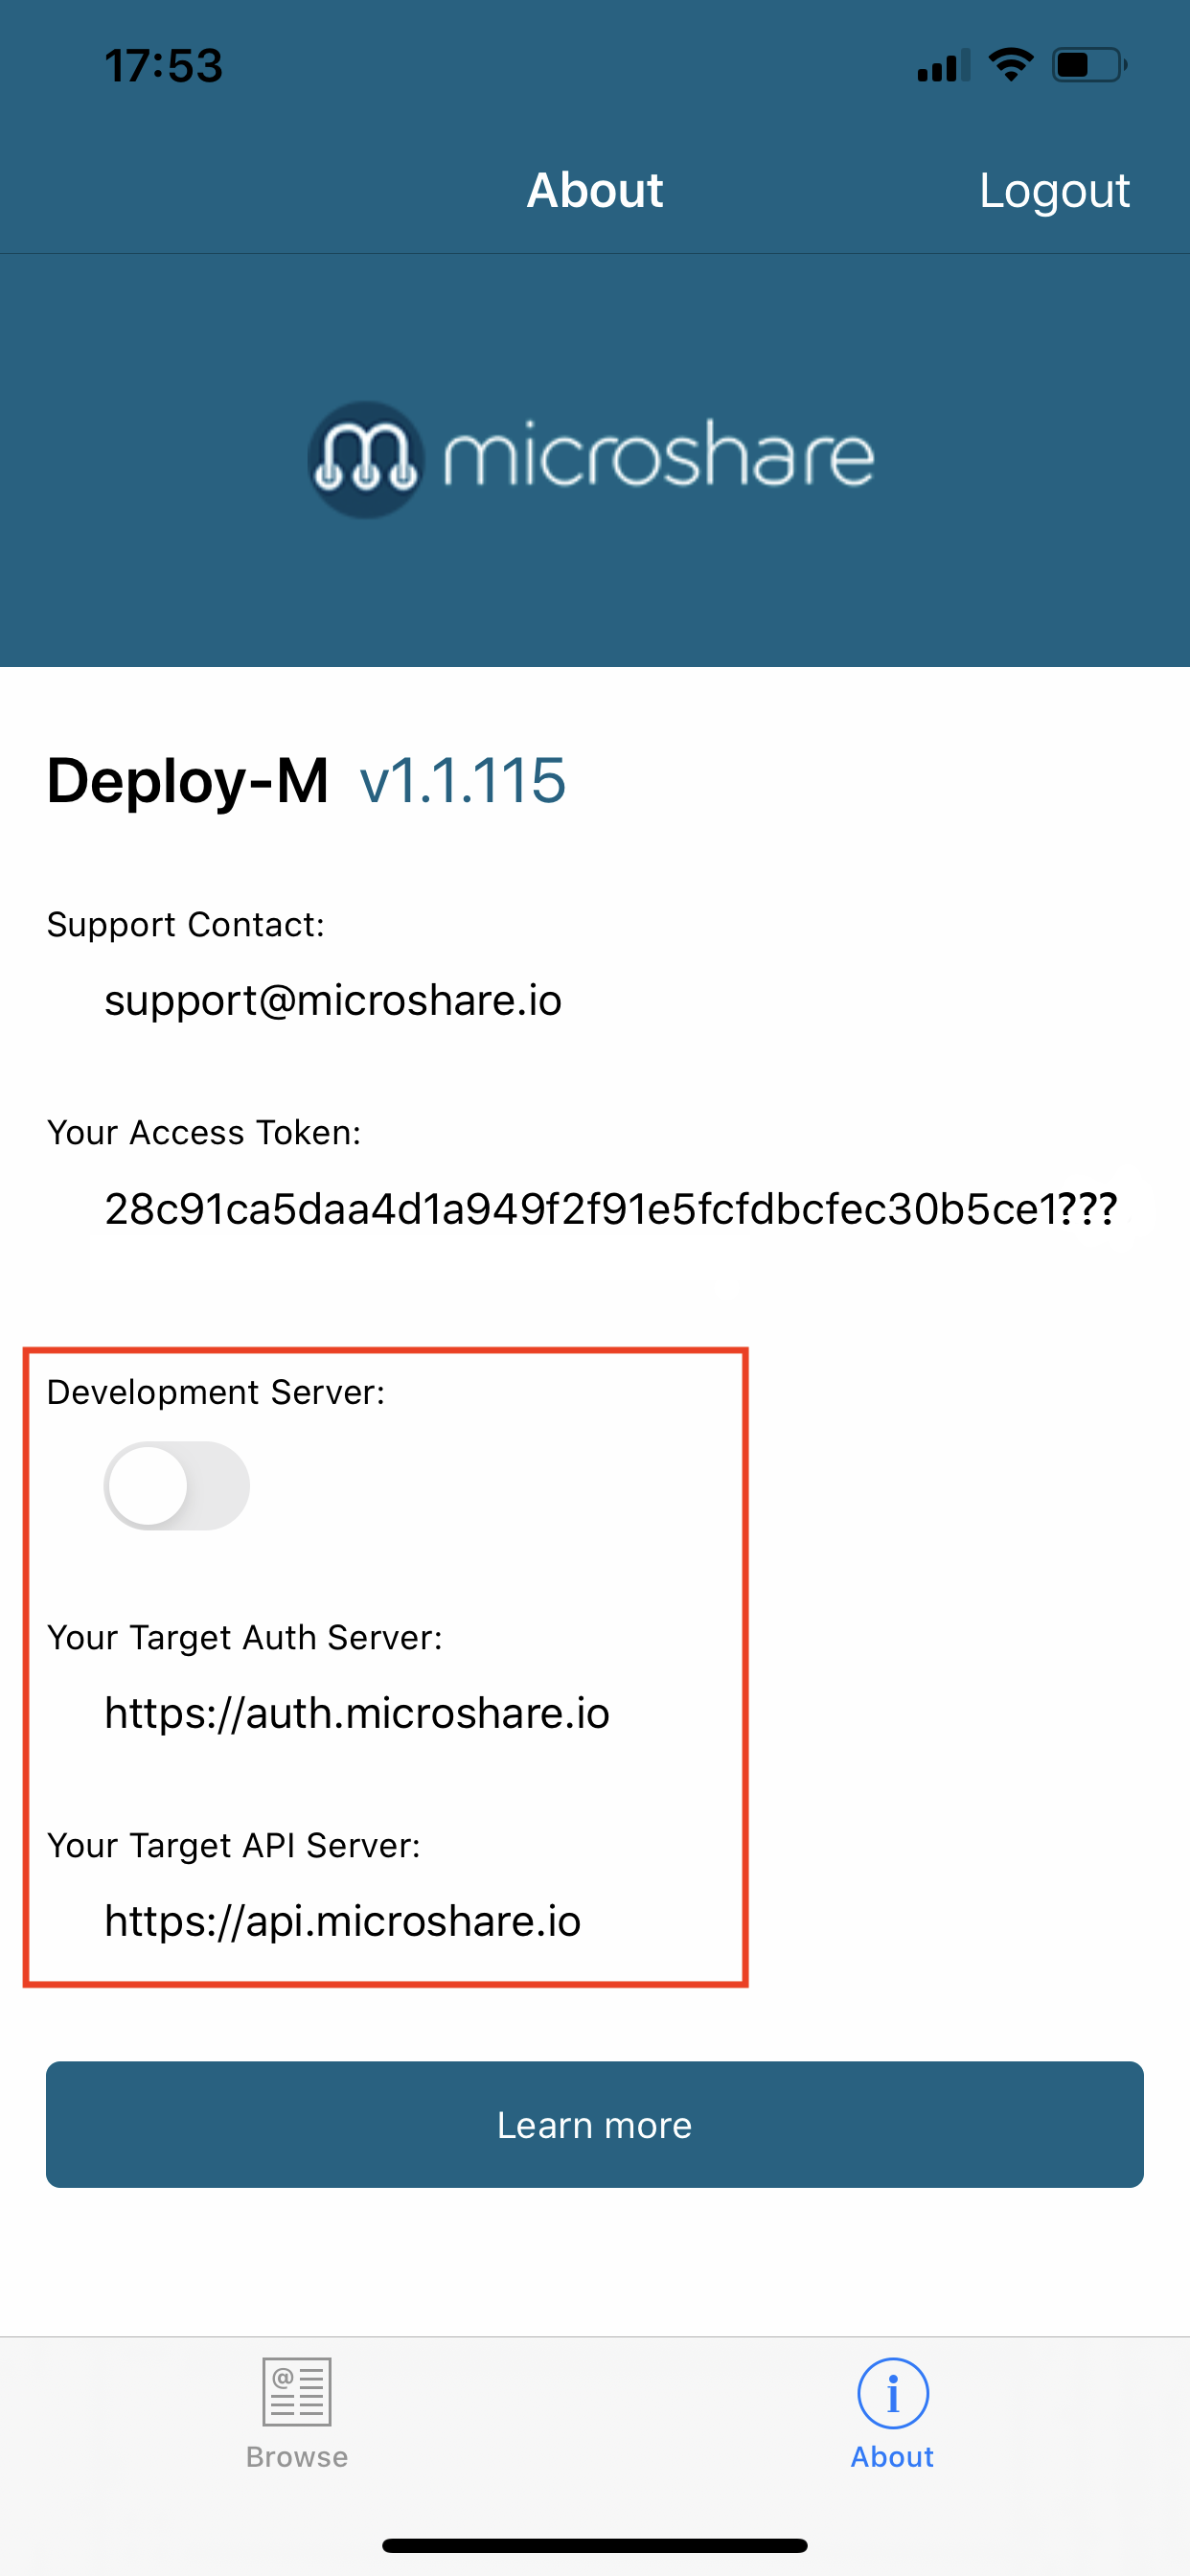
Toggle the Development Server switch then log out. Now you will be able to log in with your development server credentials.
4. Access a device cluster
1. Make sure you are on the device cluster management page, where you can see the device clusters in your account.
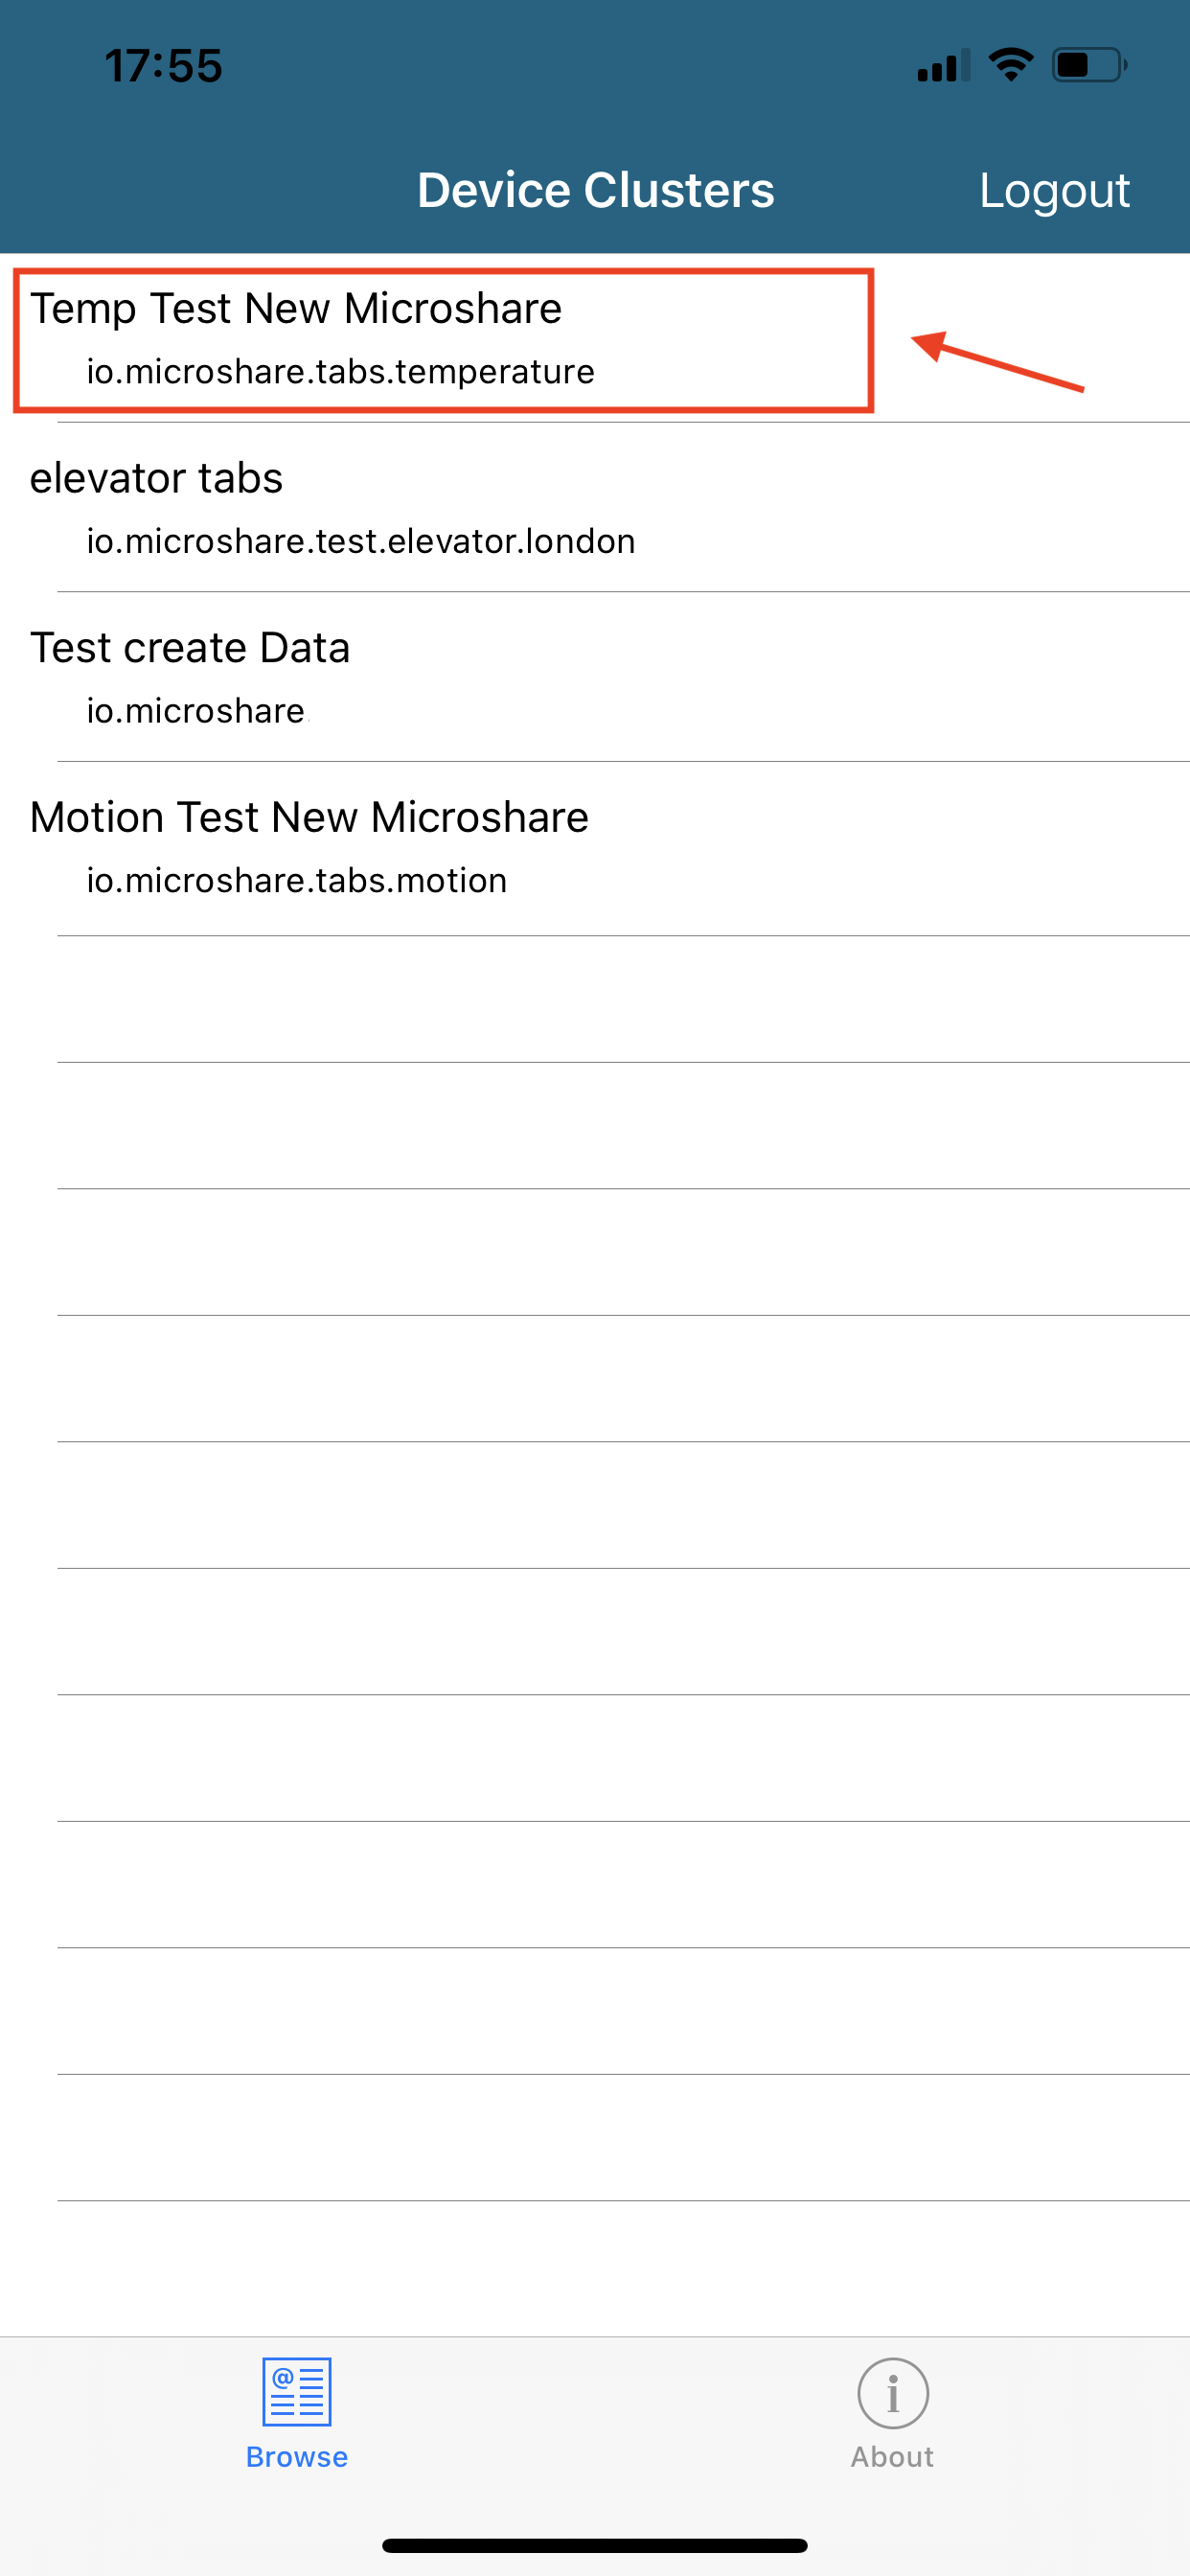
2. Tap a device cluster to see the devices within that cluster.

5. Add a device
1. To add a device, tap the Add button at the bottom of the screen.
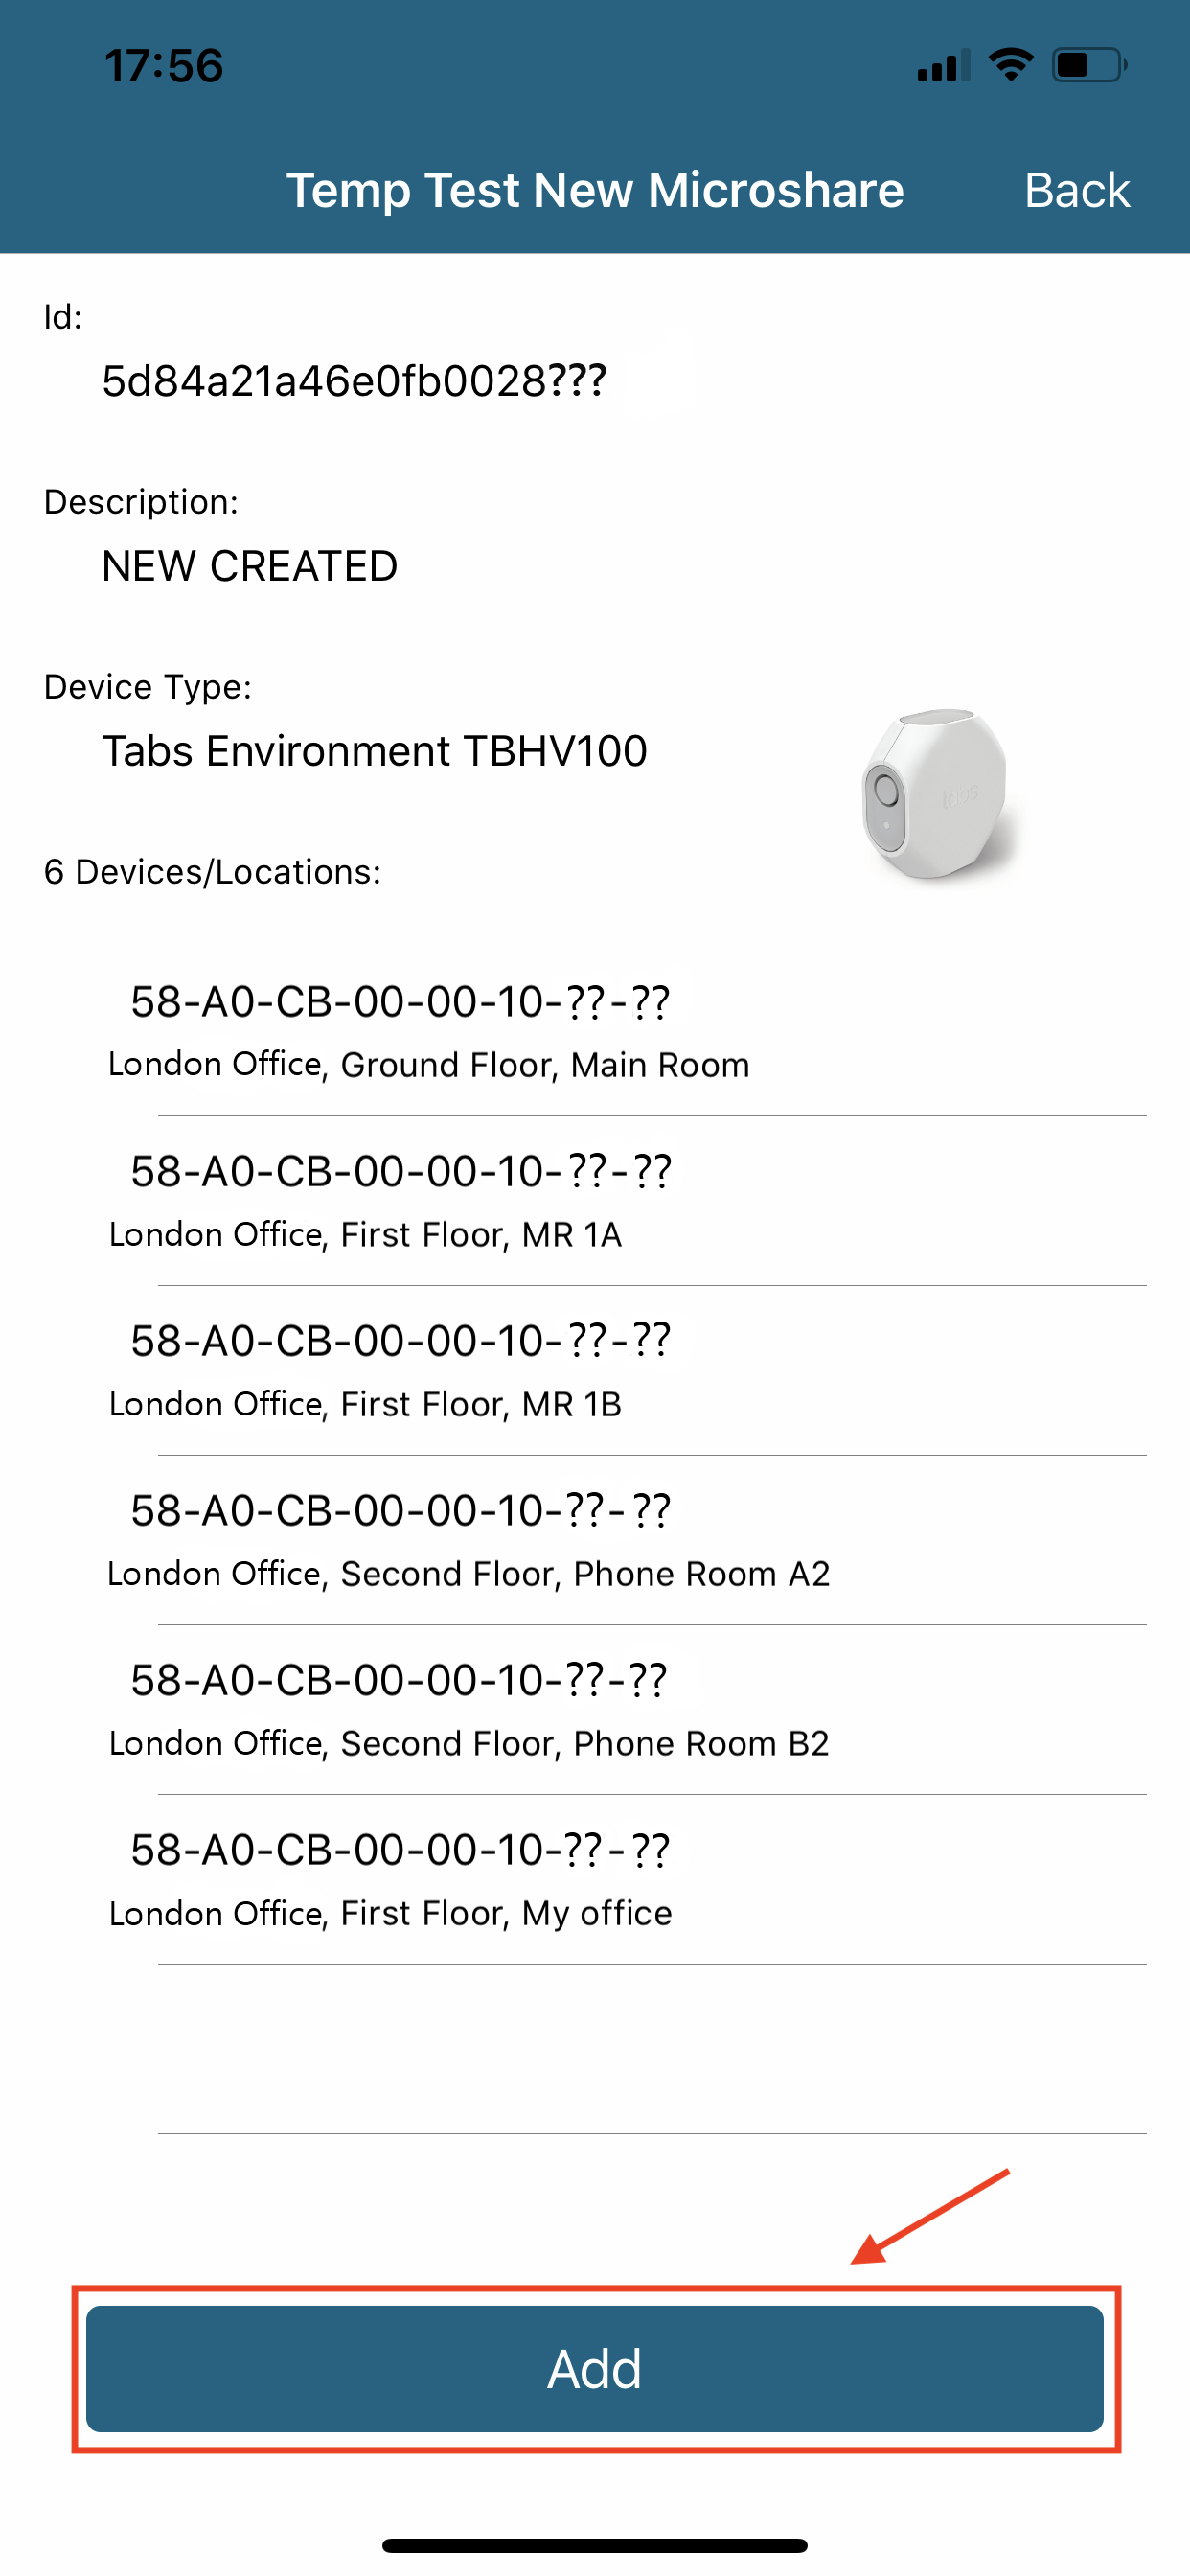
You can add a device manually or by scanning the Microshare QR code.
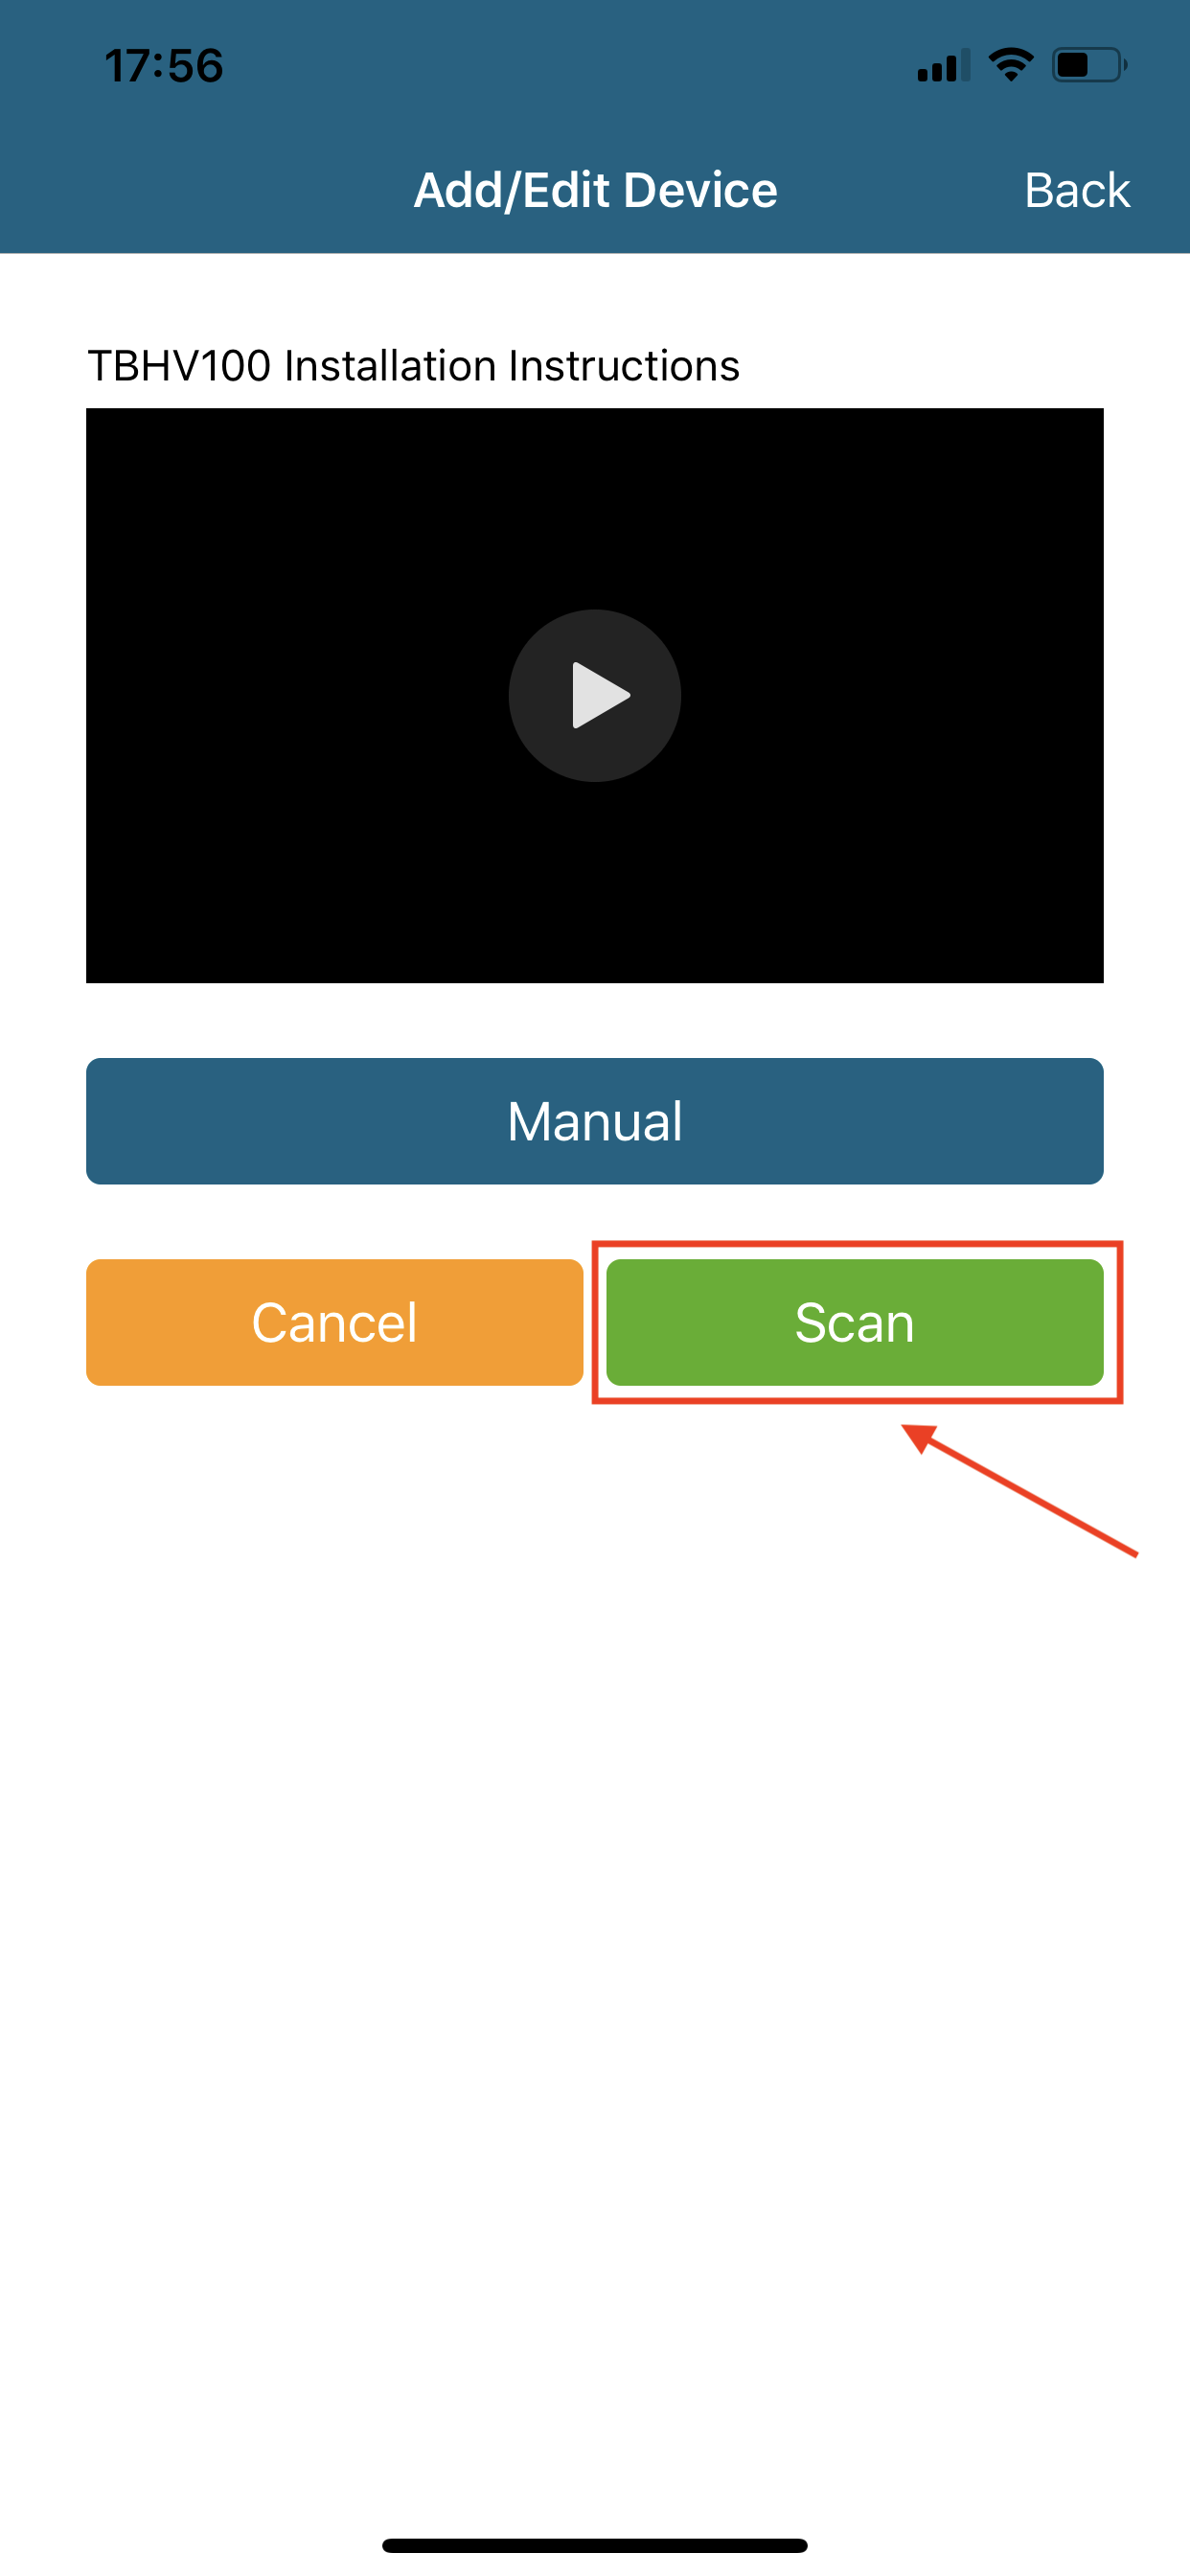
2. Tap the Scan button to open the scan page, then move the camera and/or device until the QR code is visible in the camera view as seen in the image below.
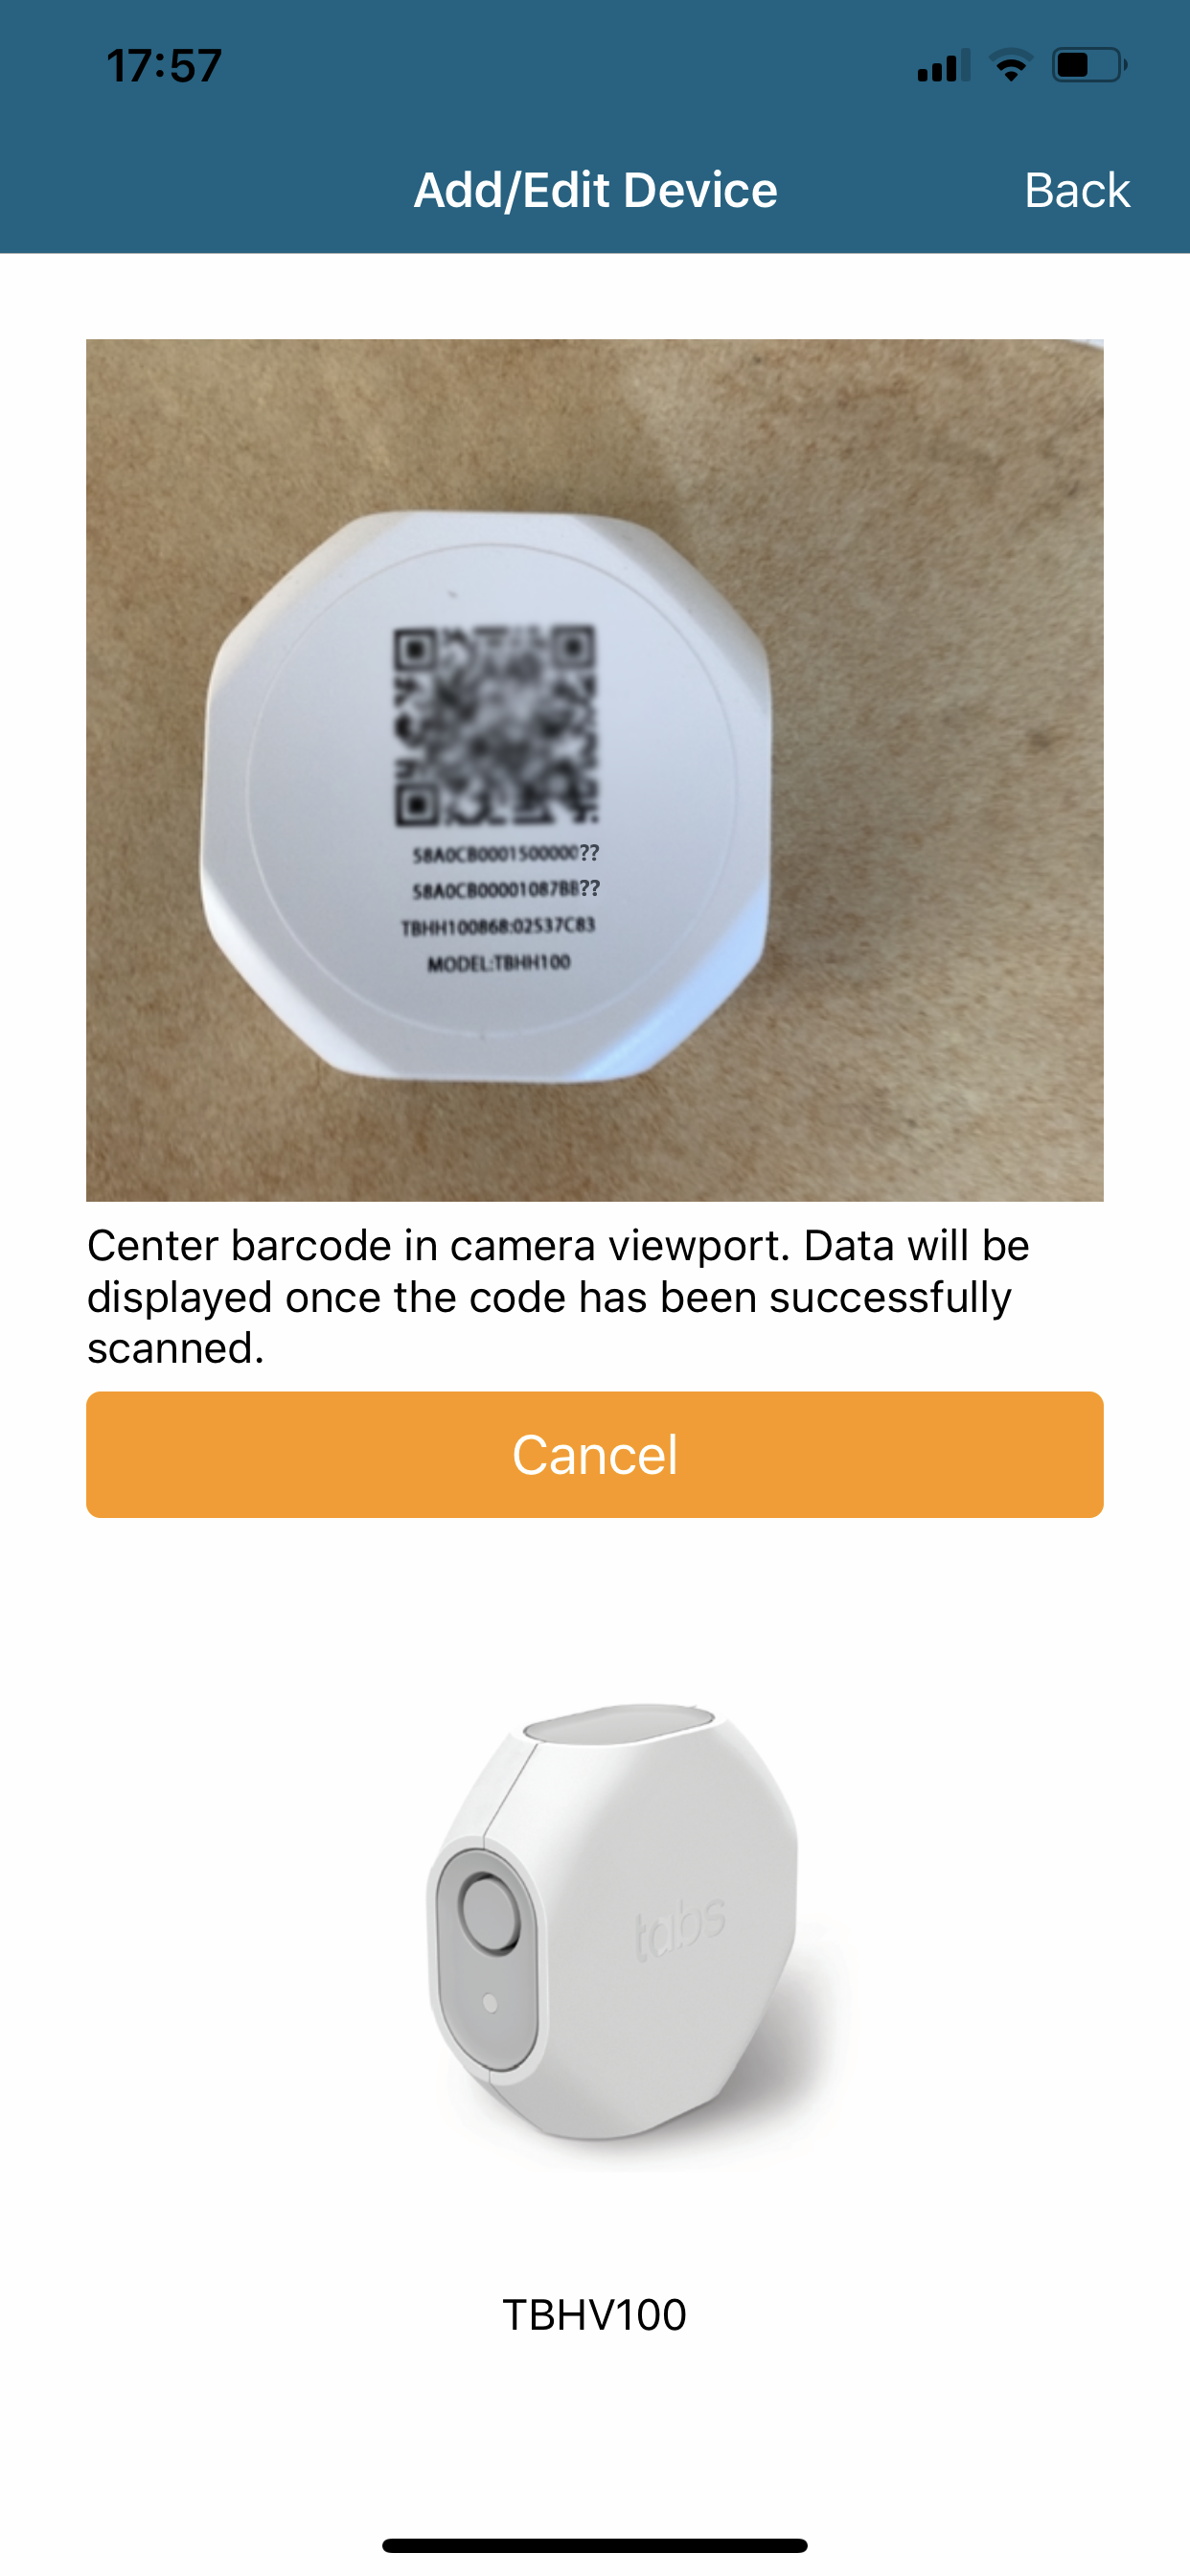
Deploy-M reads the device ID and the device type from the QR code and opens the Add/Edit Device page to allow you to fill in additional information.
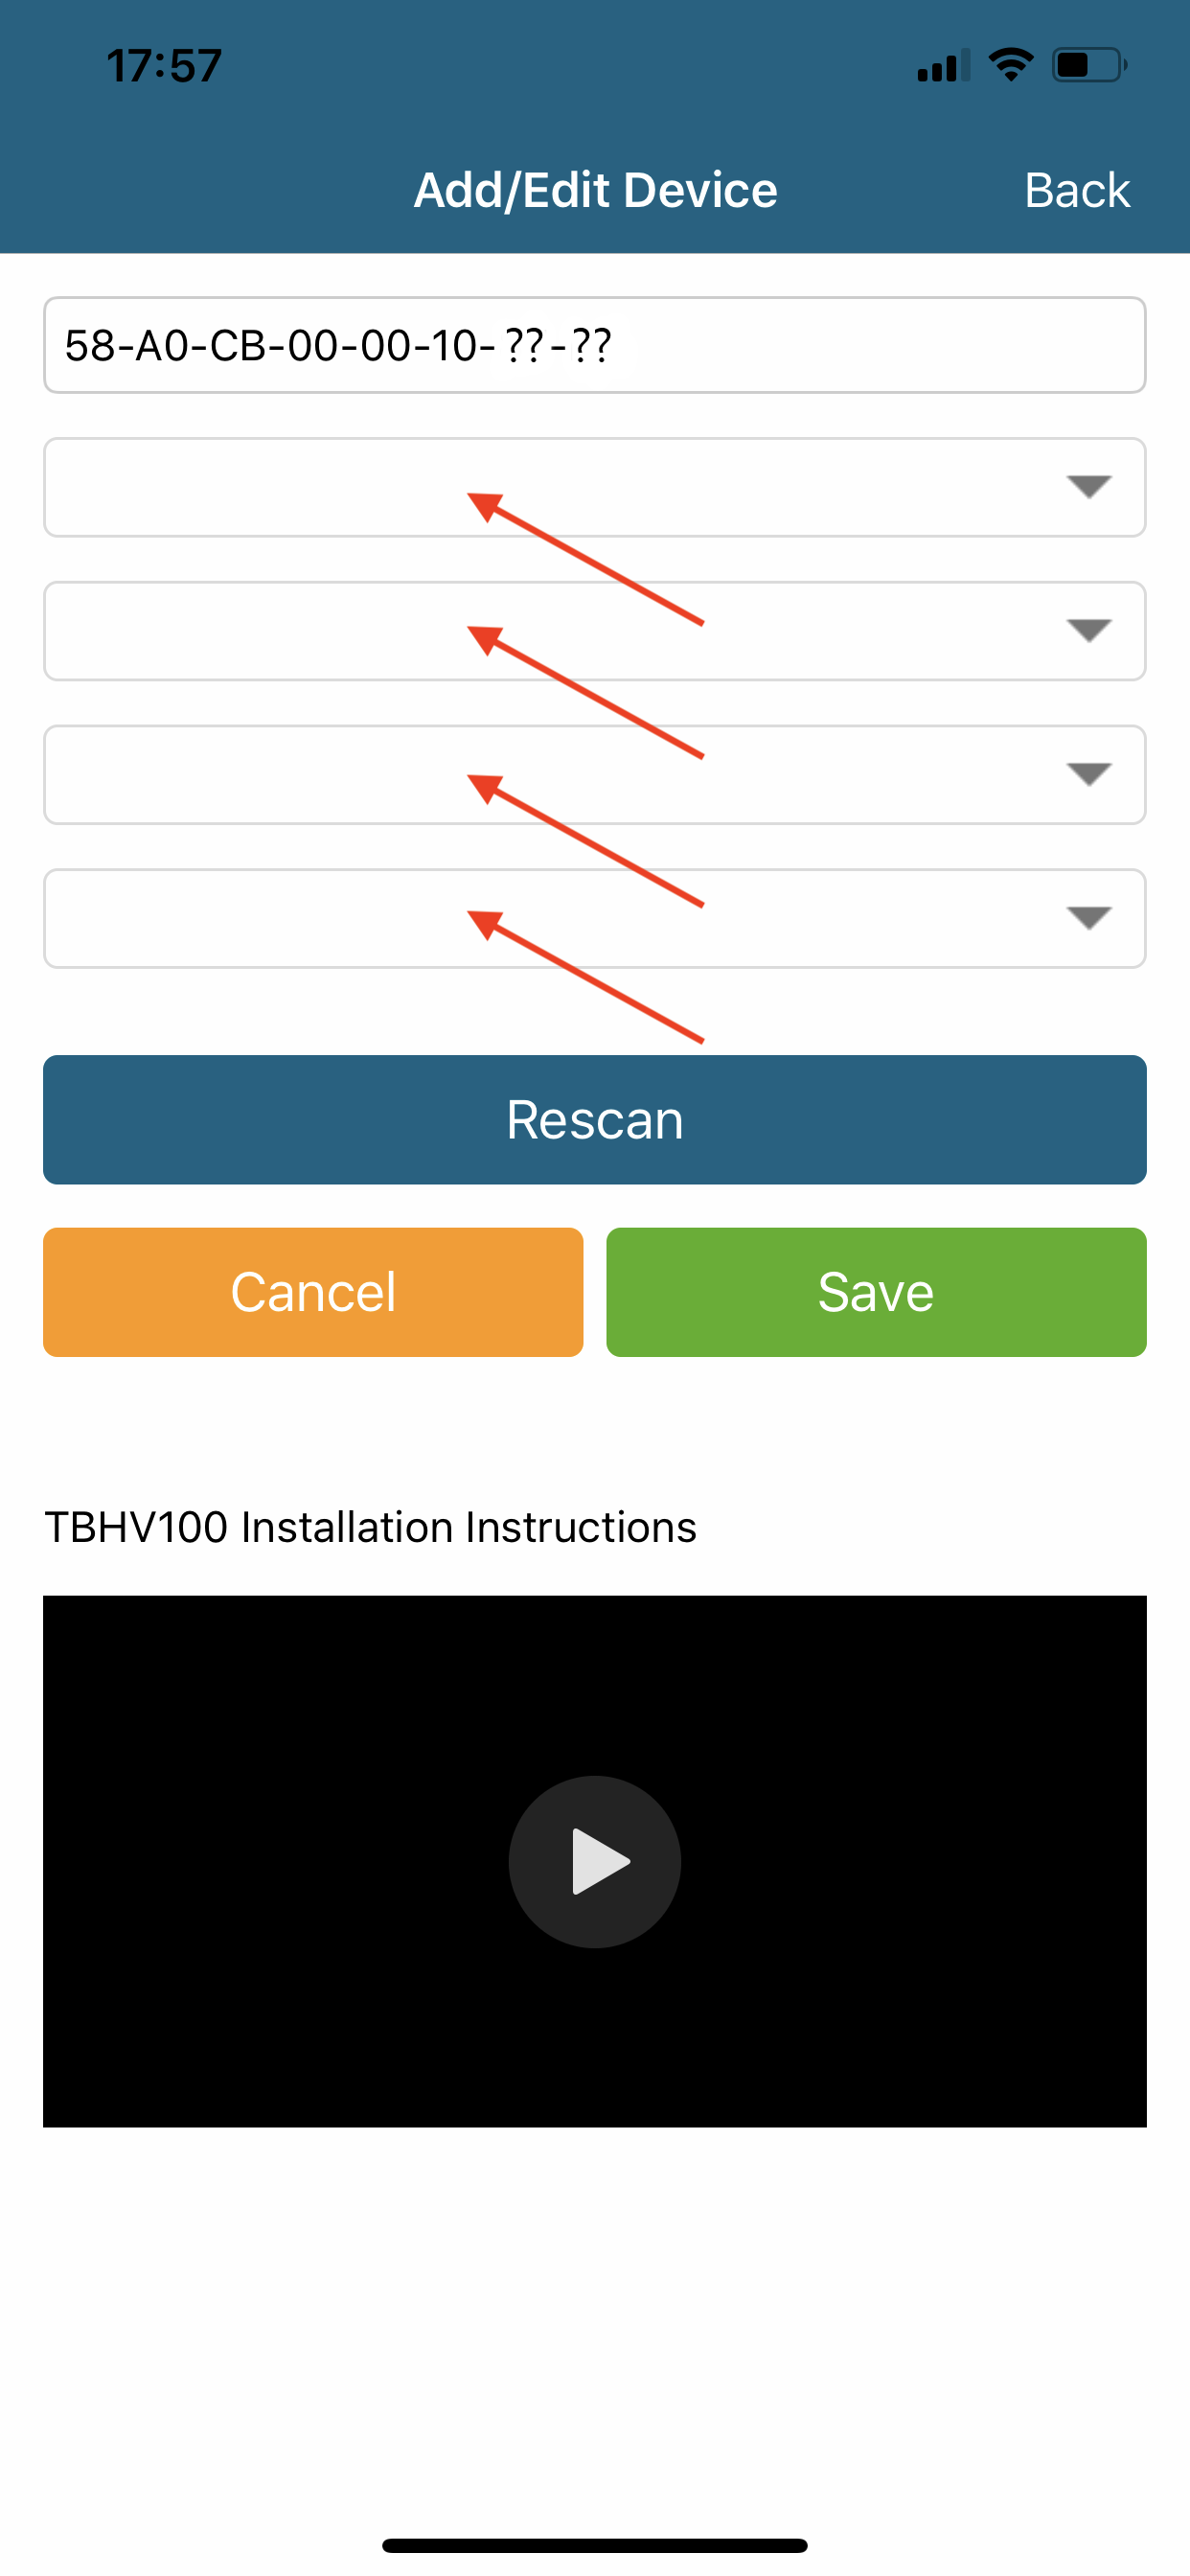
3. The four dropdown fields are the location tags used for digital twinning. They usually correspond to the building, floor, room and optional location index.
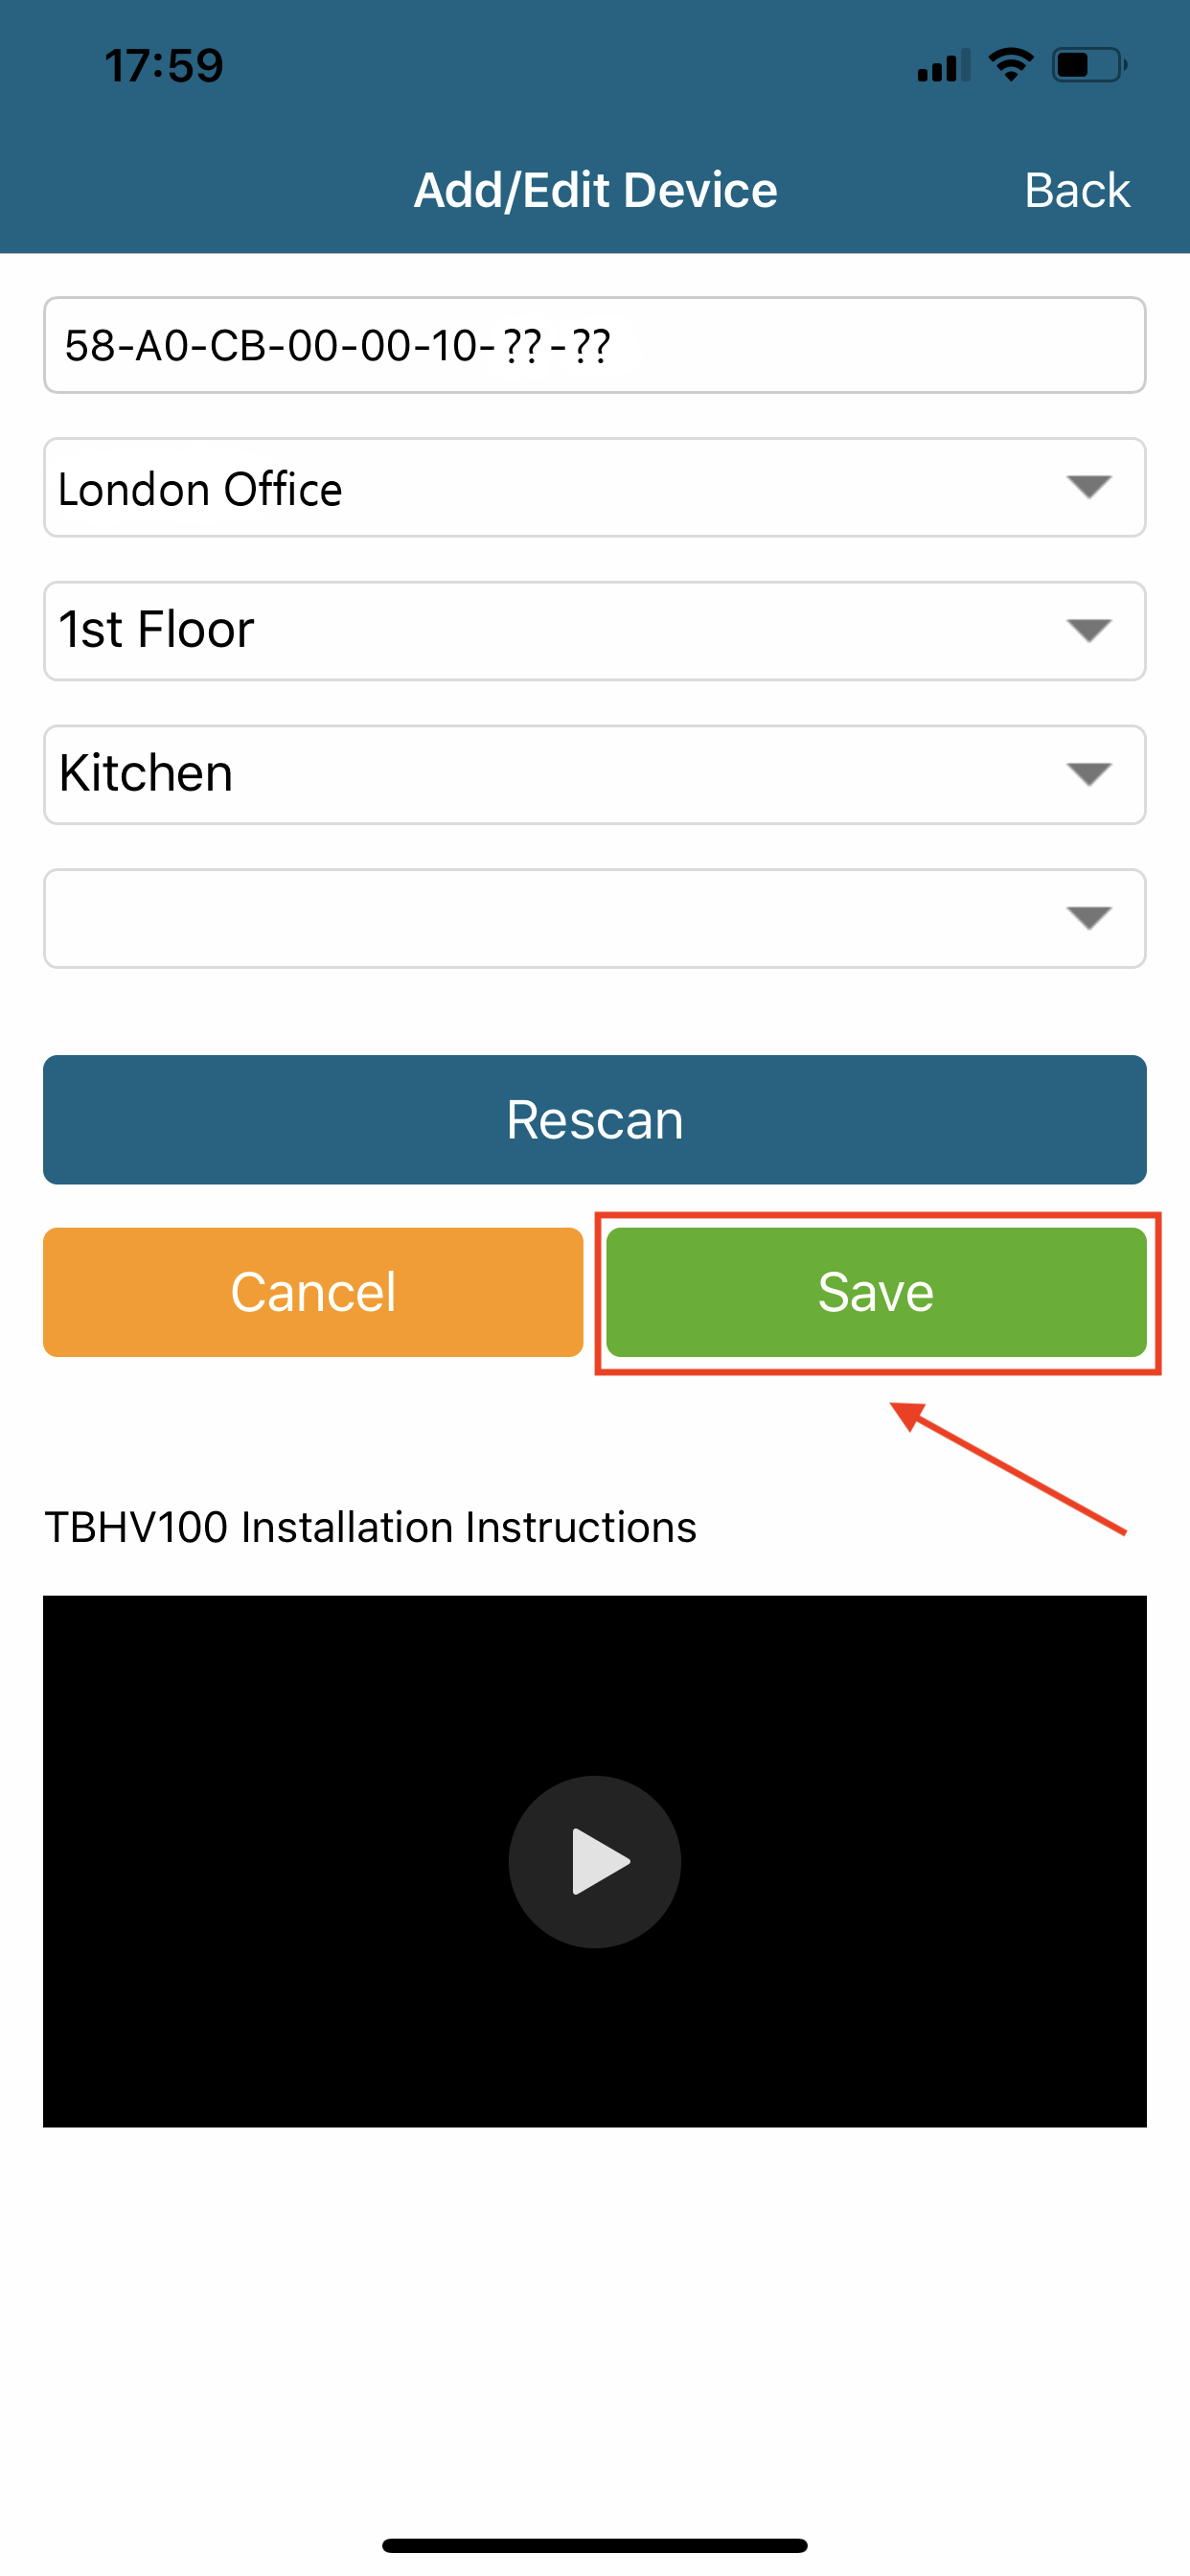
Make sure you fill in the correct location tags as this is critically important for the digital twinning process. Find more information on location tags here.
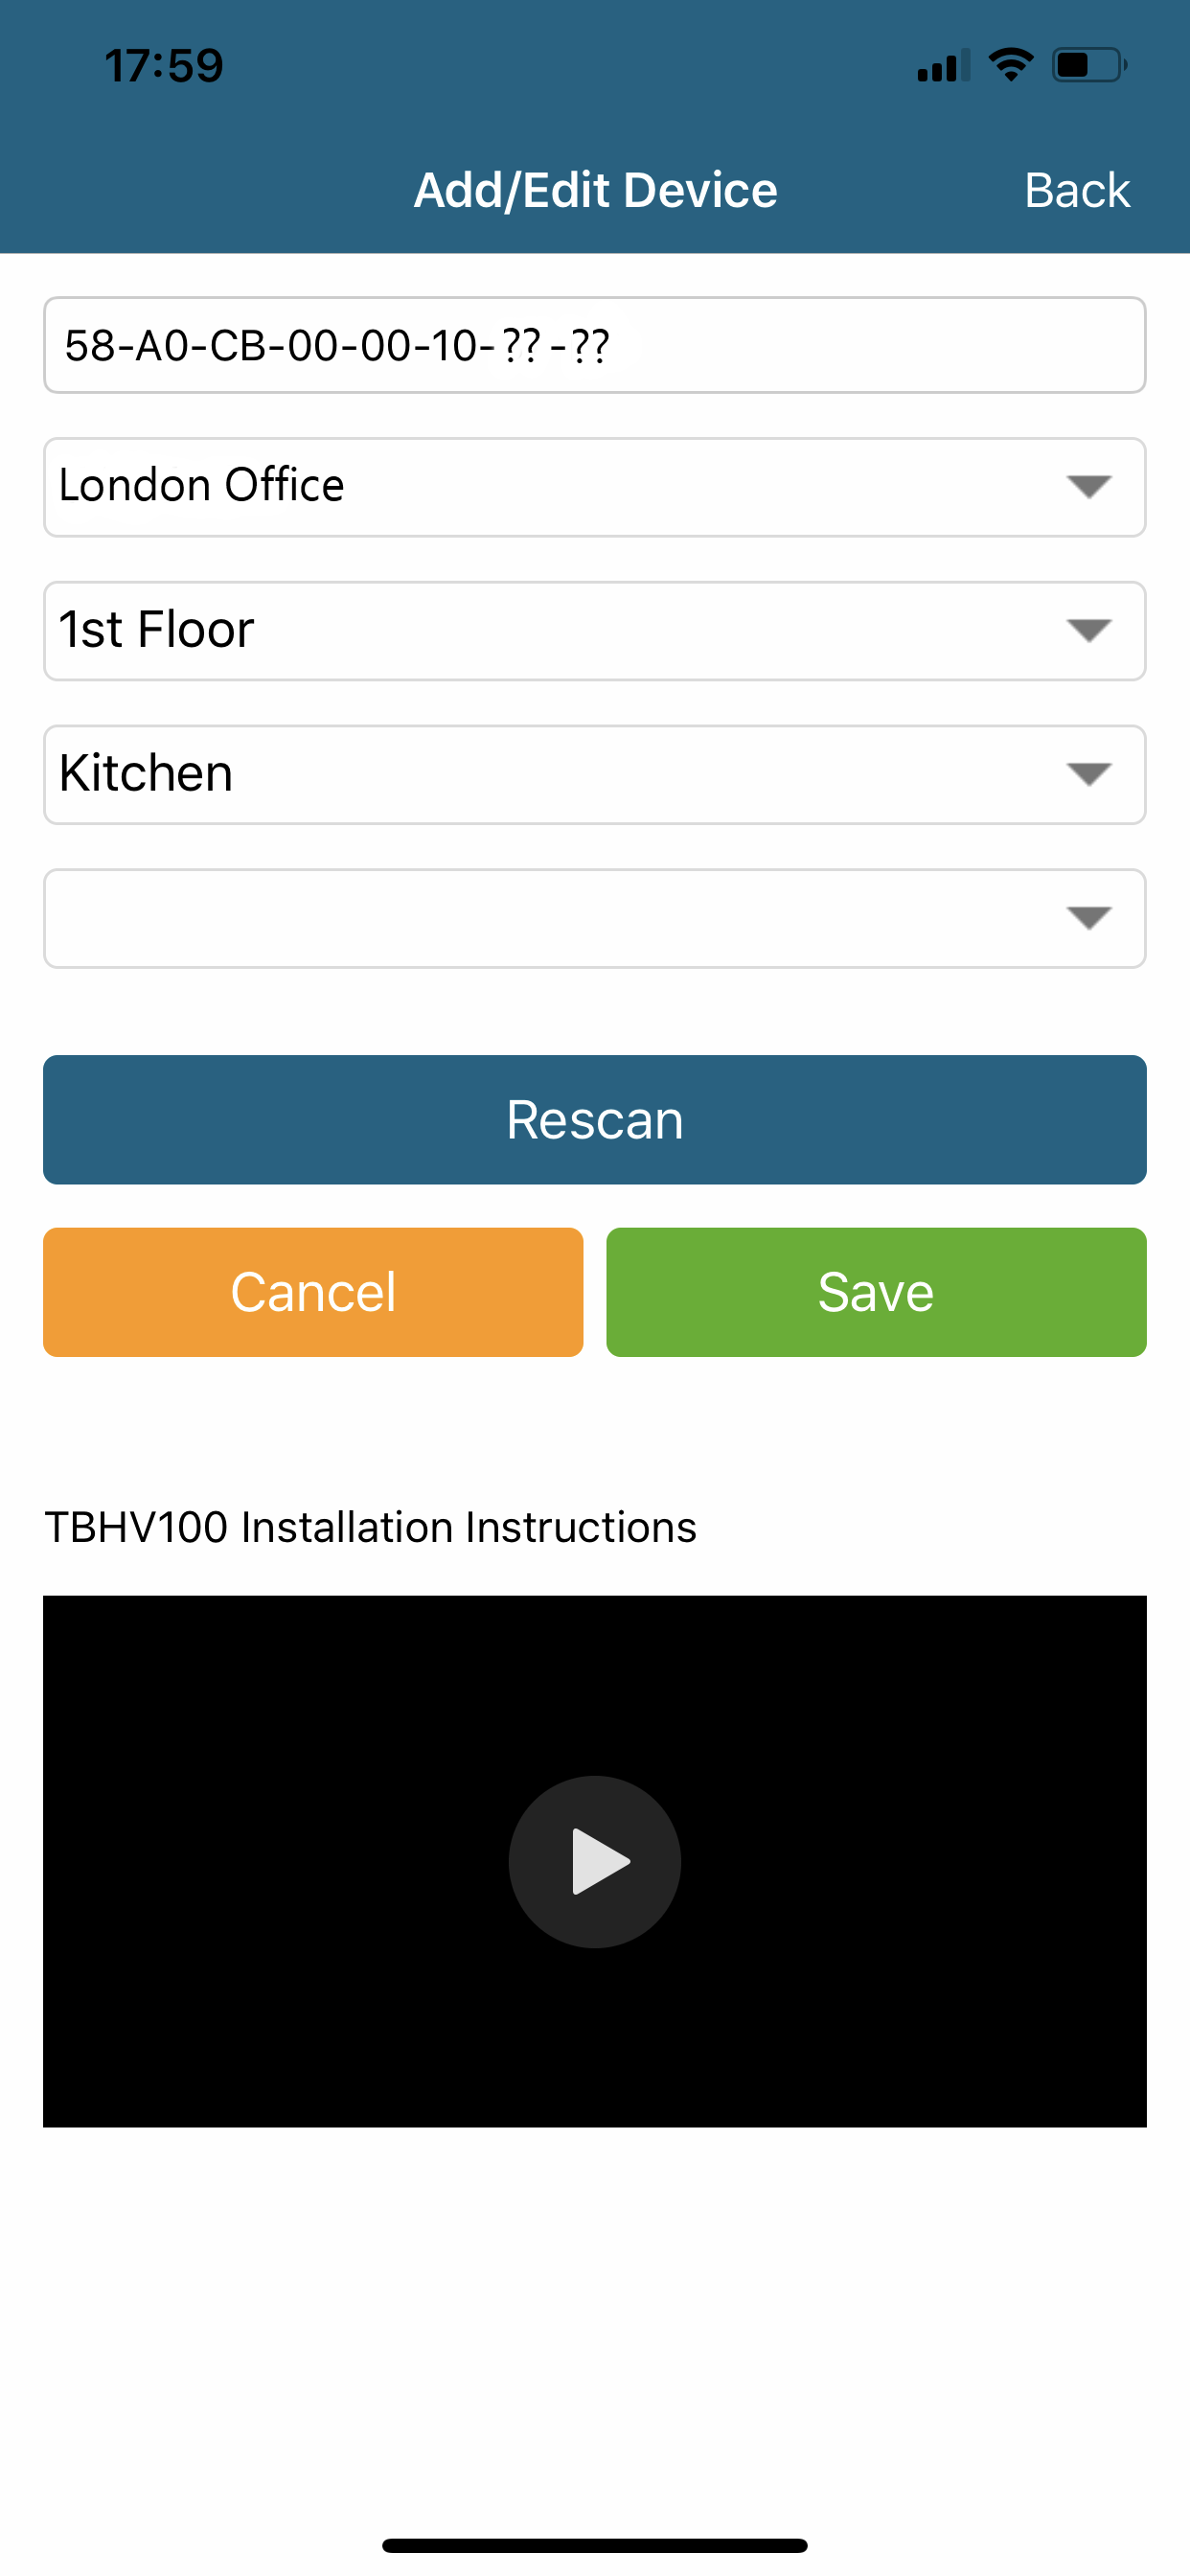
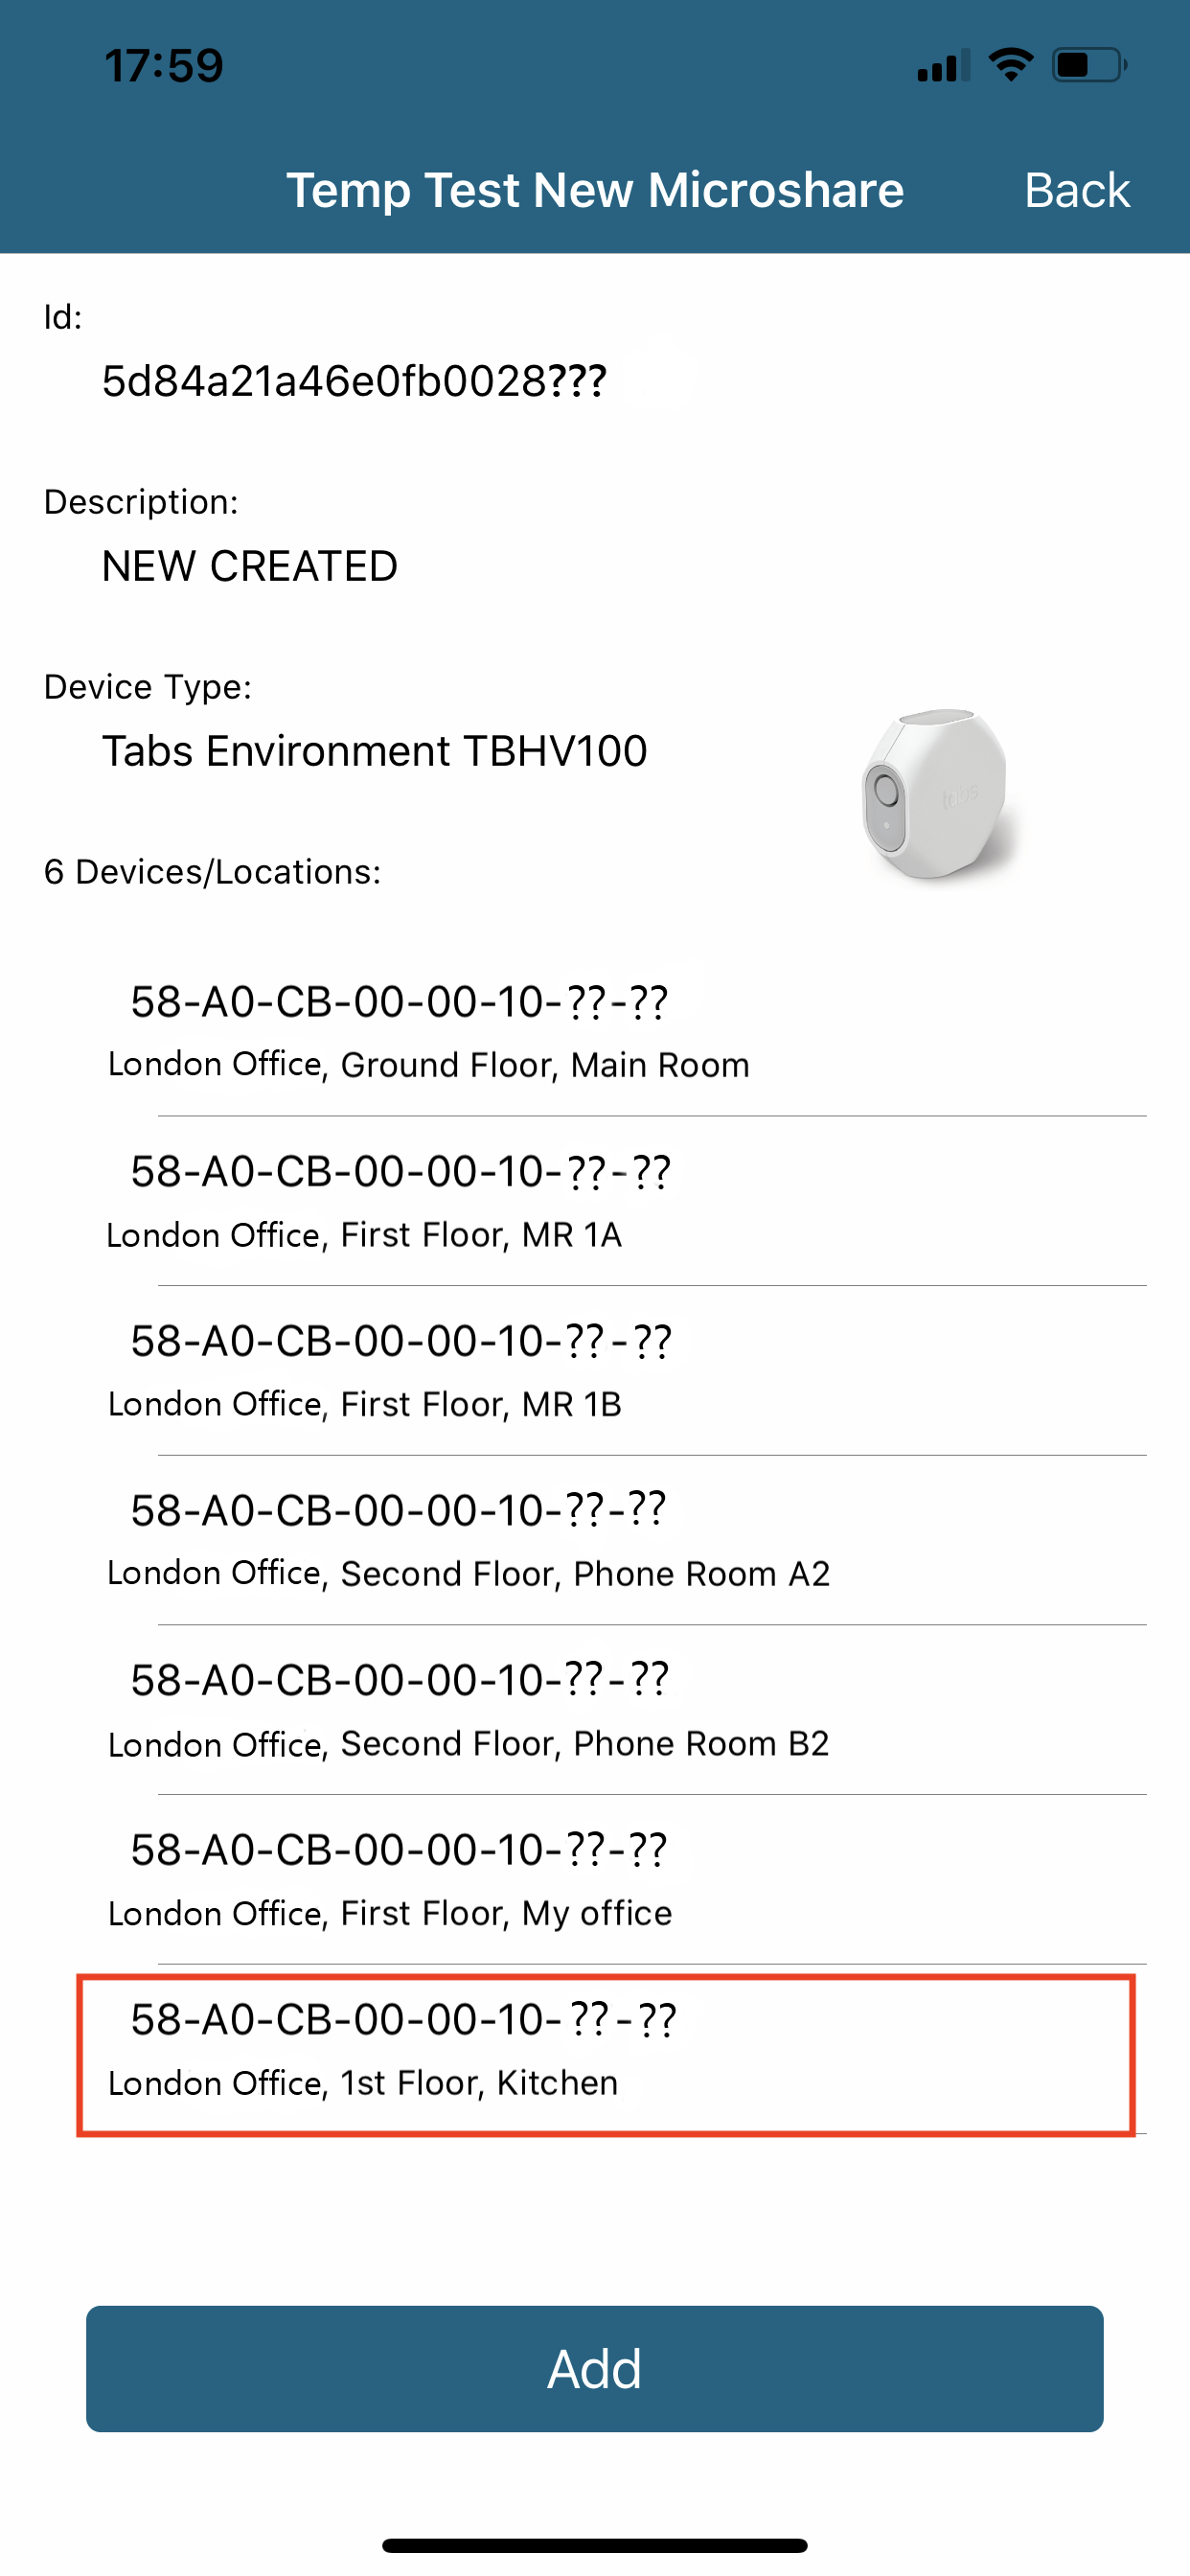
4. Once you’ve finished filling in the fields, tap the Save button to add the device to the device cluster and save the change to your Microshare account.
6. Edit a device
To modify a device, tap the device cluster, then the desired device.
Modify the information manually, or tap the Rescan button to scan in a different device for this location. Save your changes to your Microshare account by tapping the Save button.
7. Delete a device
To delete a device, swipe left on it, then tap Delete.
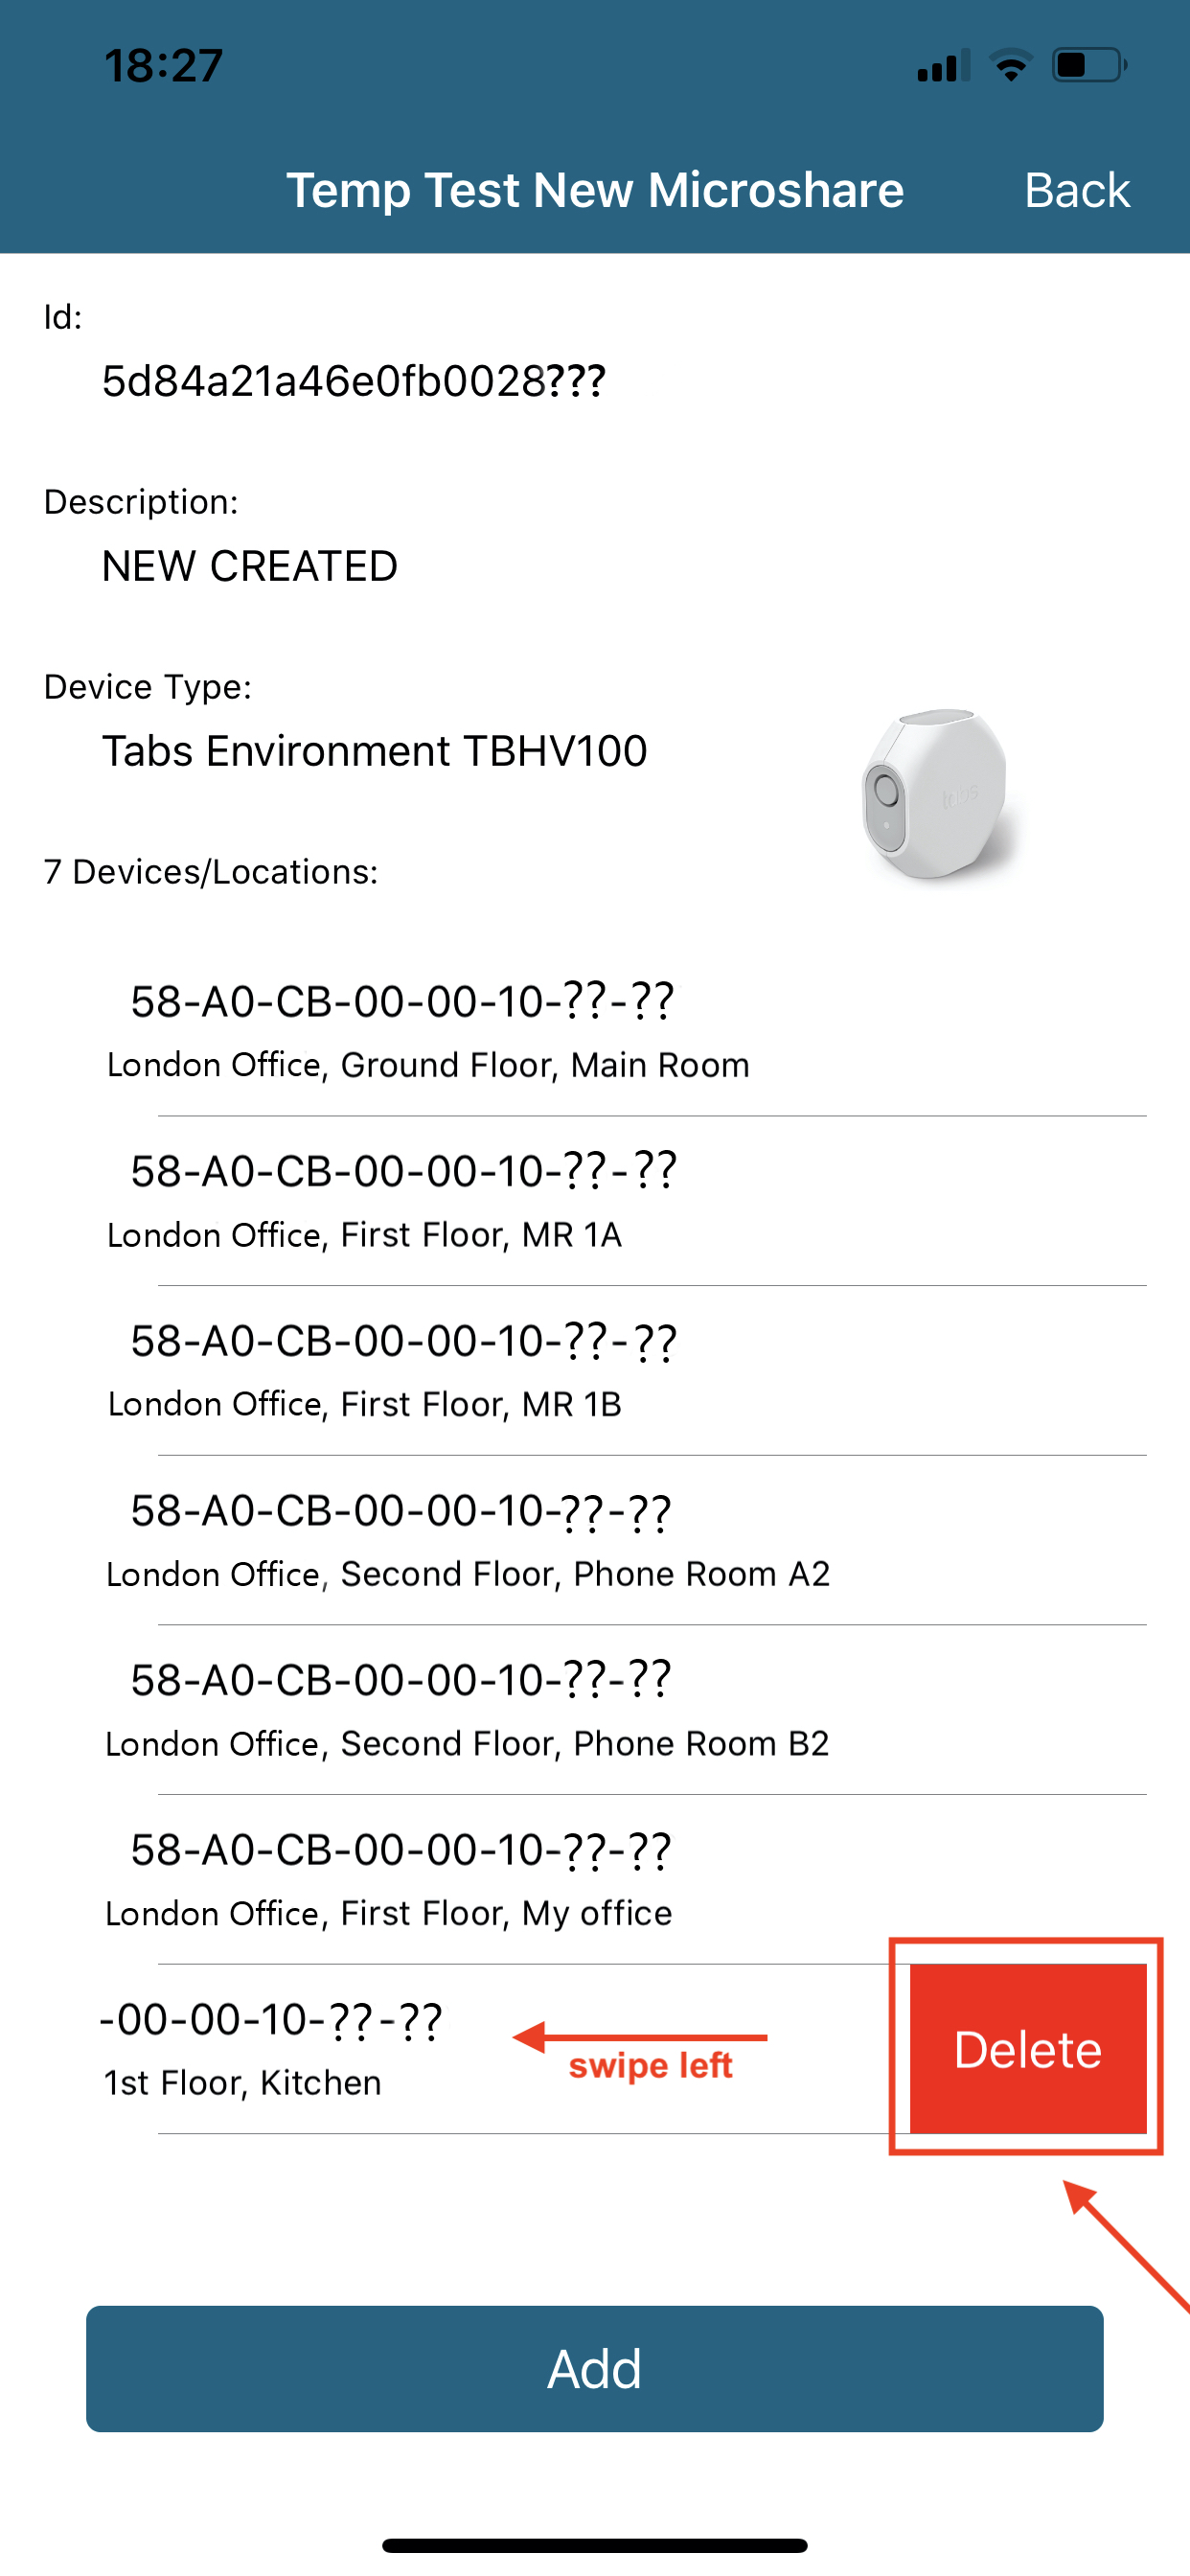
The device is now deleted.