Skiply Clock E Battery Replacement
Skiply Clock E Battery Replacement
How to Replace the Battery on a Skiply Clock E Feedback Device
-
Unscrew the four finger-tight chrome screw caps.
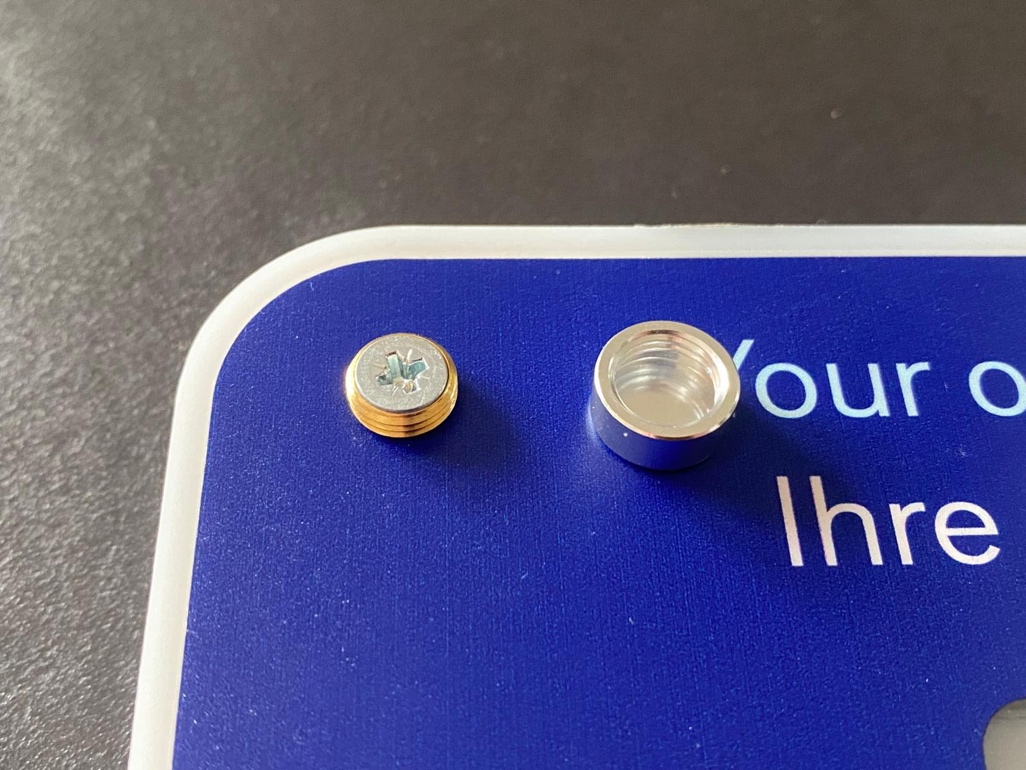
- Use a Philips head screwdriver to remove the four screws found underneath.
- Be careful not to lose the four brass spacers.
- Remove the front face plate.
- Turn the device over and gently tap the back.
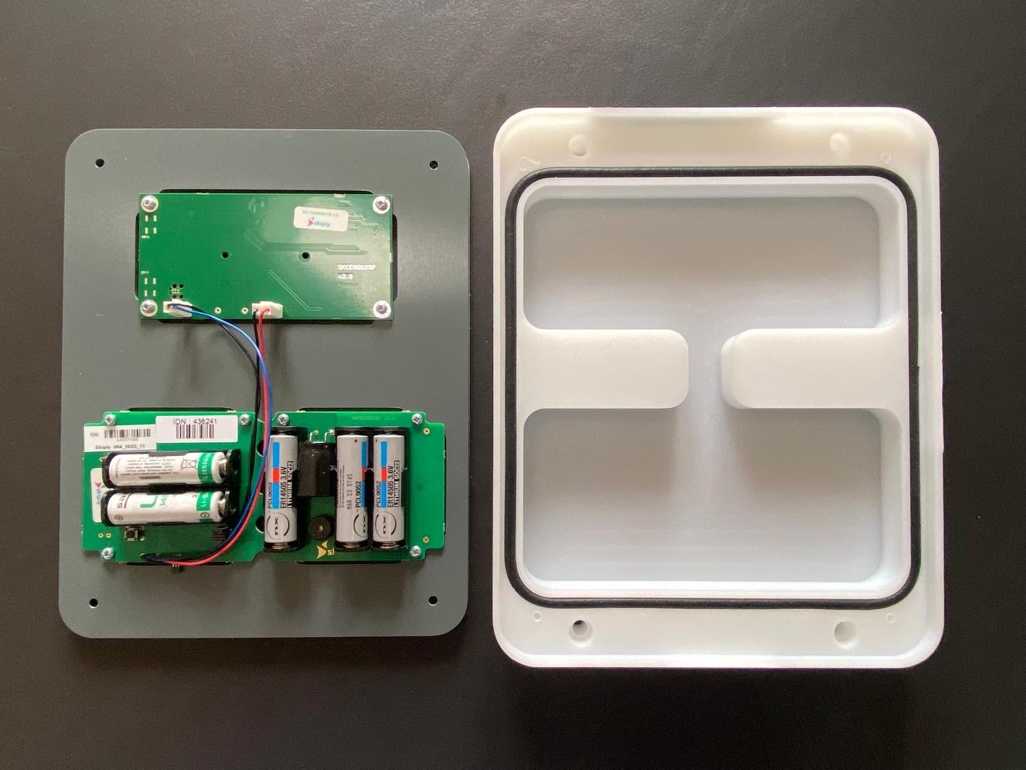
- Turn the device over and gently tap the back.
-
Remove the five batteries.
- With batteries removed, press any faceplate buttons multiple times.
- This discharges any residual power on the board.
-
Insert new batteries, ensuring correct orientation with + & - terminals.
-
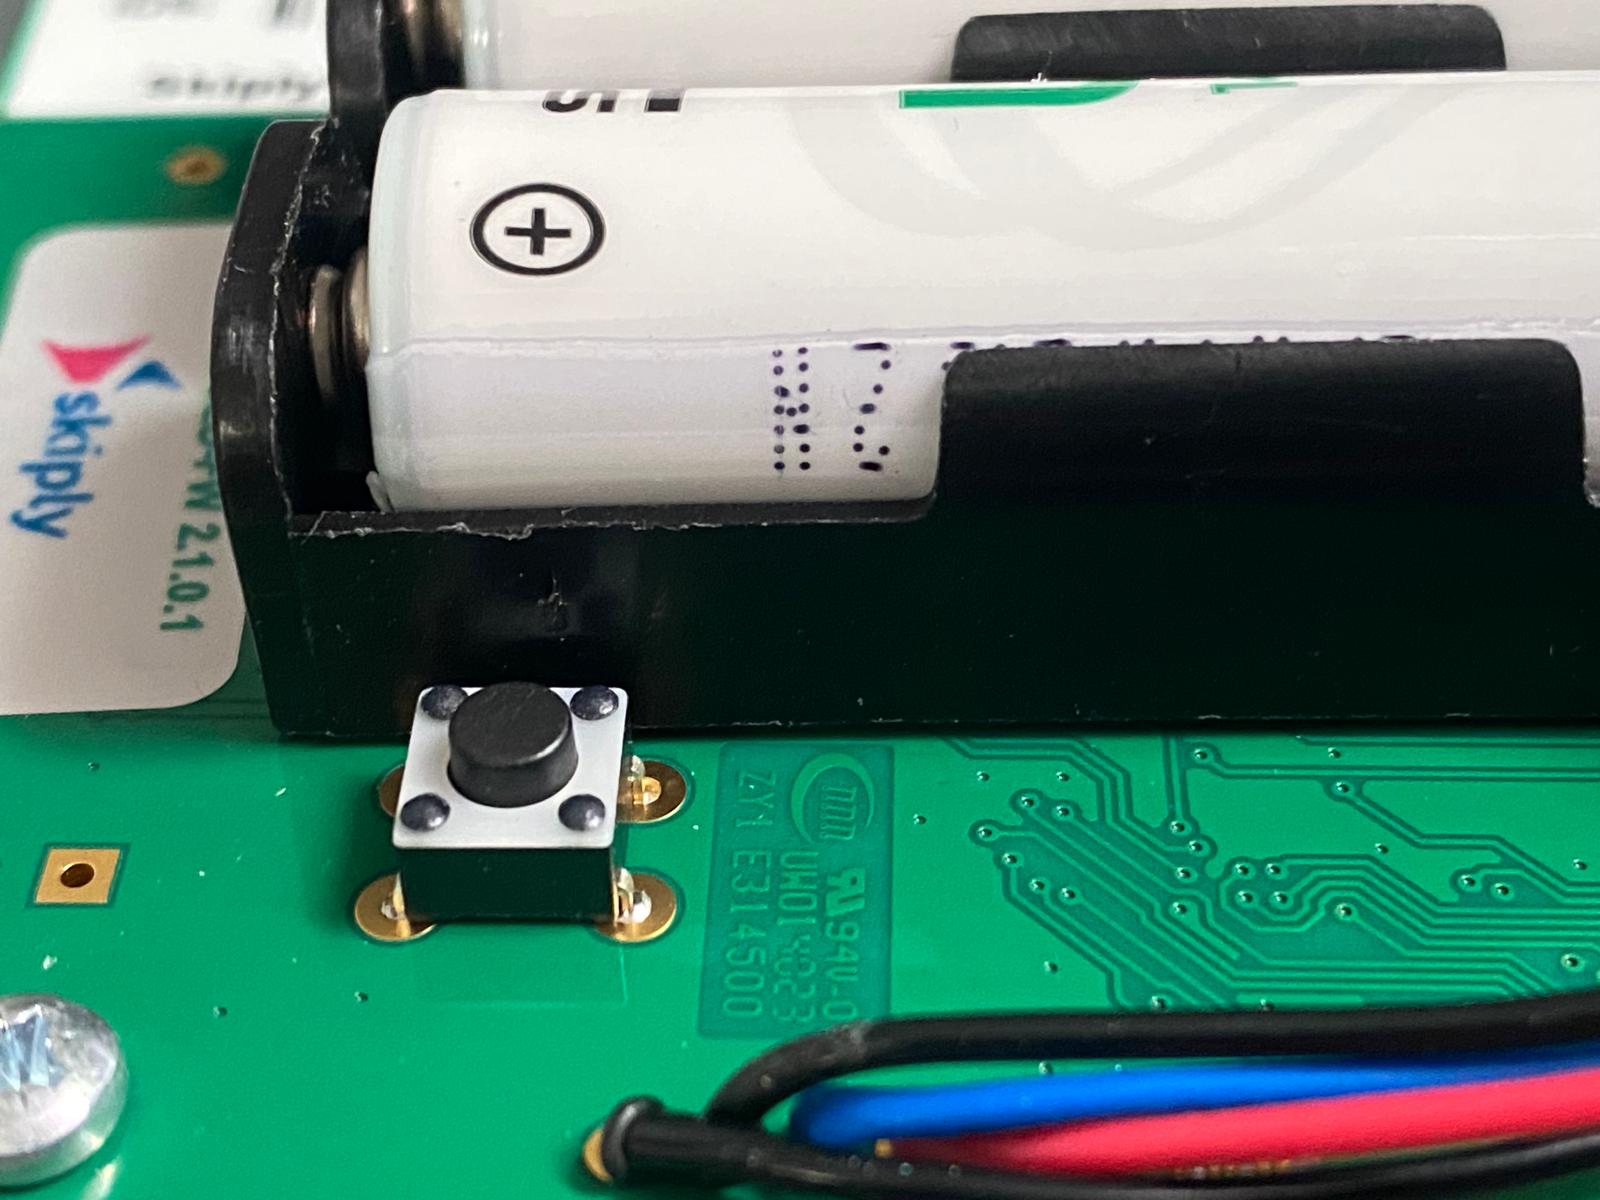
Press the Manual Reset Button found at the bottom left side of the two batteries.
-
The LEDs will cycle through a power reset of green and red flashes, ending with a longer flash of red LEDs.
-
At this time, the display may still appear to be blank.
-
Perform a Badge-In, after which the display should be on and display “Today at…” with the current time.
-
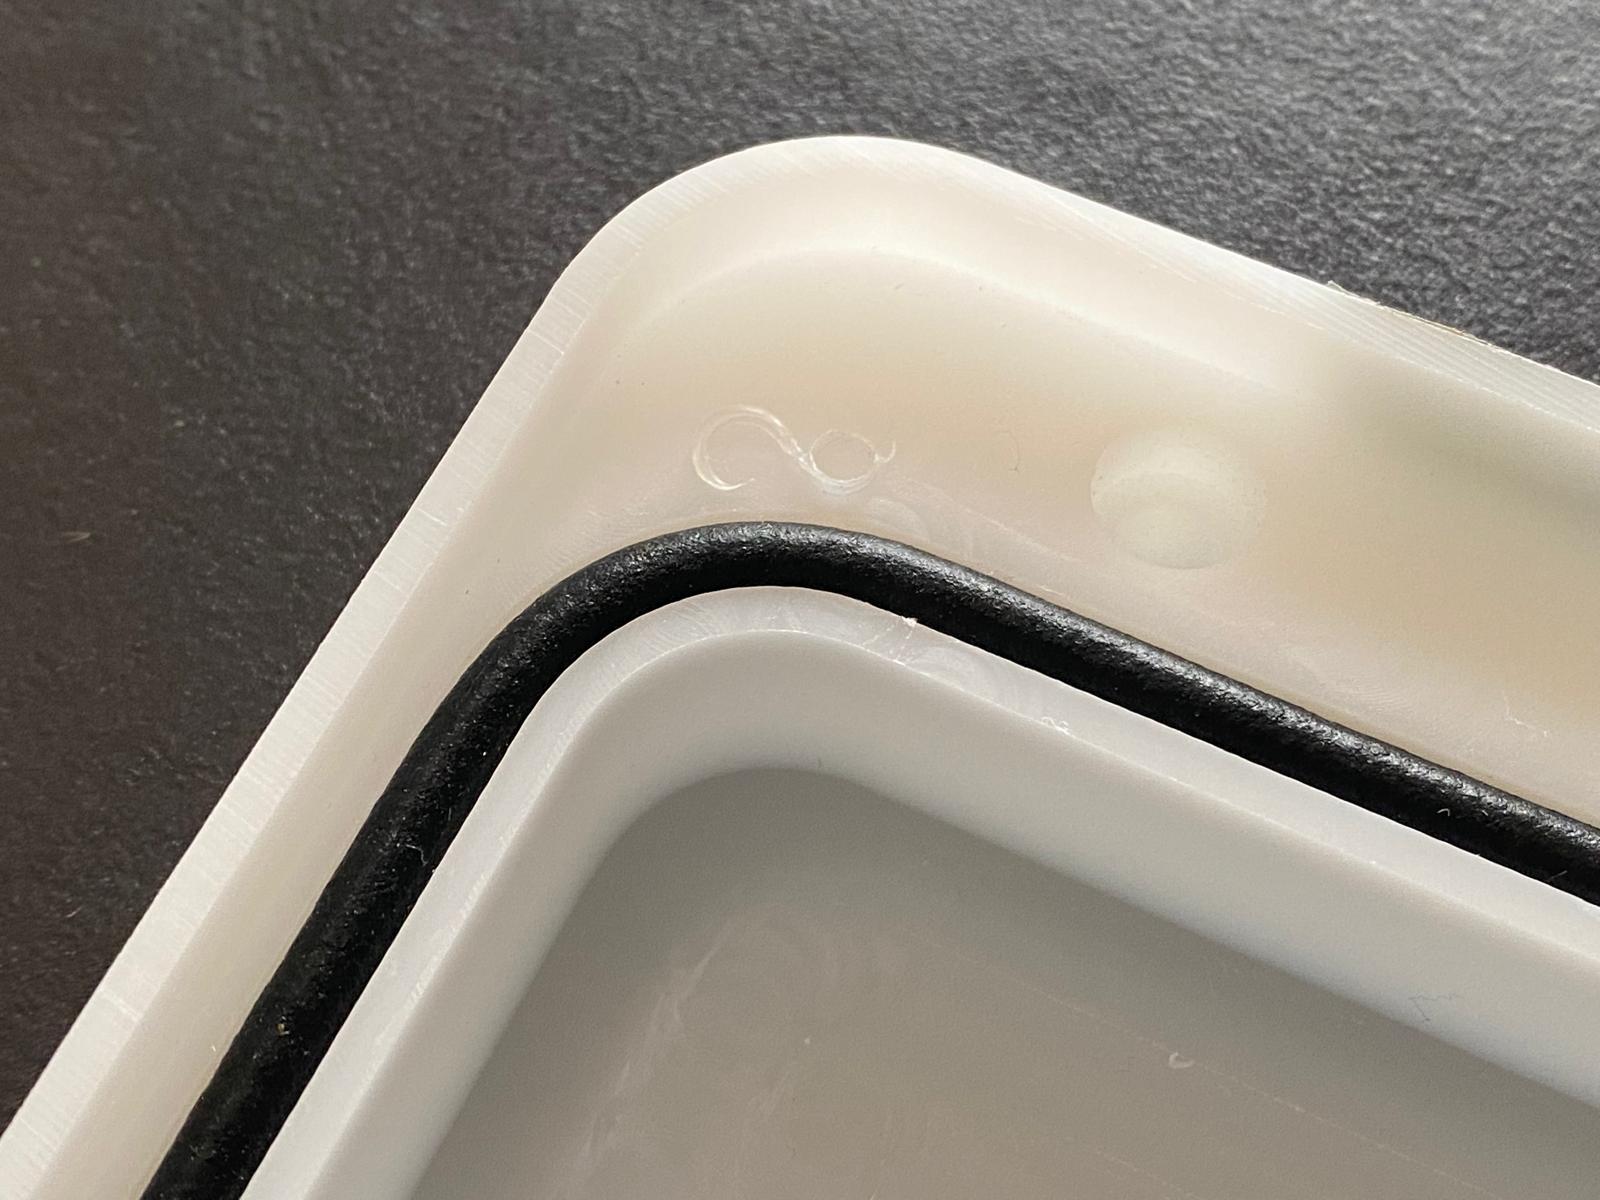
Ensure the black rubber seal is correctly tightly within the groove of the backplate.
-
Fit the faceplate onto the backplate, ensuring the seal has not moved.
-
Screw in the four corner screws. Note: Take care not to overtighten the screws, as this can deform the brass spacers.
- Lastly, fit and finger-tighten the four chrome screw caps.
Joining the Network
In order for the Feedback Device to join the network after a battery replacement:
- Press any button on the faceplate. This will send data from the device and initiate a join to the network.
- Any subsequent button press will be seen as data.
Checking Buttons
To ensure all buttons are working correctly:
- Press each button in sequence, wait 12-15 seconds between each button press.
- Wait 12-15 seconds then perform a Badge-In. You can find a link to the process here: Badge-In Video
- You can use Dashboard to check the data.
- Check email notifications have been received for Service Request button presses.