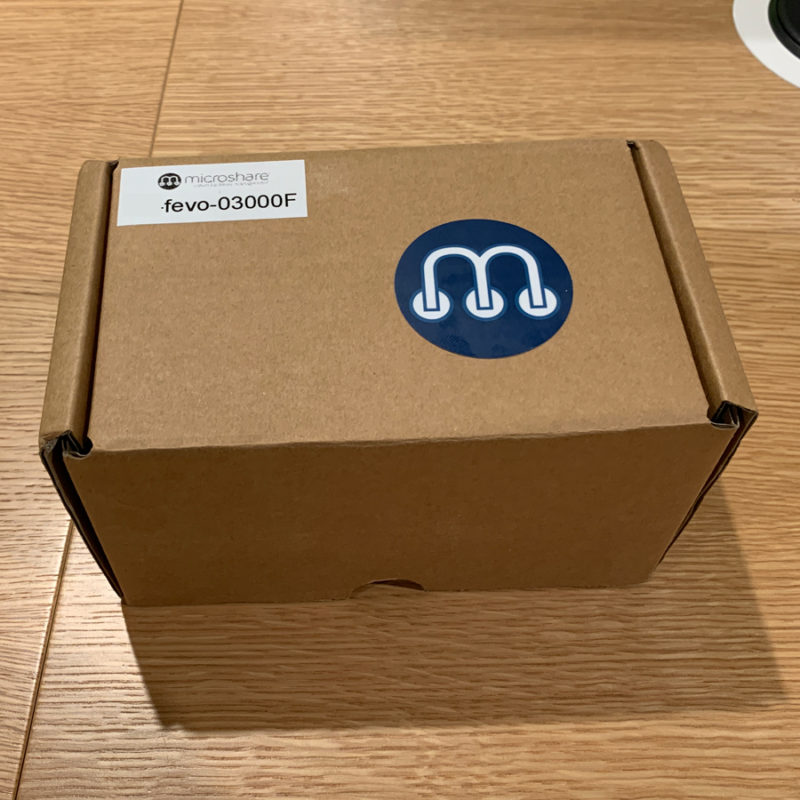
Kerlink iFemtocell Evolution Installation Manual
How to set it up?
Summary:
Contact installation@microshare.io should you require assistance.
Disclaimer
Information in this document is provided in connection with Microshare solutions. Nothing on or in the Publication shall be construed as conferring any license under any intellectual property right, including any right in the nature of trademark or copyright, of Microshare. Microshare expressly forbids the unauthorized use of its logos, trademarks or other graphics, whether registered or not, including, without limitation, Microshare, and Unleash the Data. All registered trademarks are registered in the United States of America (and/or other applicable jurisdictions).
Except as provided in Microshare Terms of Service and other sales conditions for Microshare solutions, Microshare assumes no liability whatsoever. The following paragraph does not apply to any country where such provisions are inconsistent with local law: Microshare provides this publication “as is” without warranty of any kind, either express or implied, including, but not limited to, the implied warranties of non-infringement, merchantability or fitness for a particular purpose. Some states do not allow disclaimer of express or implied warranties in certain transactions; therefore, this statement may not apply to you.
Solutions from Microshare must be used only for their intended applications as recommended by Microshare, or their third-party manufacturer, and are not designed, intended or authorized for use for critical applications, including, but not limited to, life support, health and safety, aviation, nuclear, and security applications or for any other application in which the failure of the Microshare product could create a situation where personal injury or death may occur.
If you are installing Products at a property owned, operated or managed by a third party or where other individuals live, work or are otherwise present (collectively, “Other Parties”), you represent and warrant to Microshare that you have notified those Other Parties, to the extent required by law, and obtained all approvals, permissions, consents and authorizations, if and as required from such Other Parties, for installation and operation of the Product at the installation location, use of the Product to facilitate individuals, including delivery drivers, to have unaccompanied access to the location for deliveries to you and others, and removal of the Product. You further represent and warrant to Microshare that the location where the Product is installed is safe for individuals who access the property.
-
Using your Microshare solutions safely
-
Follow the stated battery requirements before installing any batteries.
-
Never force a connector into a port. If the connector and port don’t join with reasonable ease, they probably don’t match. Make sure that the connector matches the port and that you have positioned the connector correctly in relation to the port.
-
Protect Microshare sensors from direct sunlight, wherever possible.
-
Use Microshare solutions in environments according to their specification. Most products are for indoor use only.
-
There are no user-serviceable parts inside Microshare sensors. For service personnel: Always unplug external power supply, remove batteries, and turn off UPS battery before service operation.
-
Microshare sensors may be damaged by improper storage or handling. Take care not to drop them during transport and installation.

-
WARNING: Do not attempt to open or disassemble any Microshare solutions. You run the risk of electric shock and voiding the limited warranty. No user-serviceable parts are inside.
This information could include technical inaccuracies or typographical errors. Changes are periodically made to the information herein; these changes will be incorporated in new editions of the publication. Microshare may make improvements and/or changes in the product(s) and/or the program(s) described in this publication at any time without notice.
LoRaWAN Indoor Gateway Installation
The LoRaWAN Indoor Gateway from Microshare receives radio transmissions from the deployed Microshare IoT devices in and around your building and uses a standard Ethernet connection to your network, or alternatively the integrated cellular/mobile connection to send data securely to the Microshare Smart Network™.
The gateway is very easy to install for either the wired or wireless methods. In both cases it is usually a case of plugging in the equipment and within a few minutes it will be up and running, with the wired option offering improved data transmission reliability. The LoRaWAN gateway is a radio device and therefore will perform better when installed away from large metallic objects and partitions.
If using the cellular (4G) Backhaul option, optimal performance will be obtained if your selected physical installation location allows for a good cellular signal and is centrally located to the IoT devices you will use in your facility. Microshare can assist you to help you make the most of your installation.
What’s in the box?
In terms of deploying quickly, the Indoor Gateway can be plugged into your existing network via a standard Ethernet cable to a switch or router with Internet access. Alternatively, if adding to a network is not an option the gateway is delivered pre-configured with the 4G SIM card already activated. Inside the box you will find the Indoor Gateway, the device antenna, the power supply unit and an Ethernet cable. Installation enables IoT device connectivity and access to data through the Microshare Smart Network API, or alerts and data dashboards via Microshare Business Tools™.
Microshare delivers the Kerlink iFemtocell Evolution Gateway ready for addition to your existing IT network. All you need to do to have your LoRaWAN network up and running is to:
- Connect the antenna.
- Plug into a main power source.
- Connnect to your network with an Ethernet cable and wait 1-2 minutes for the connection to be established.
Installation Instructions
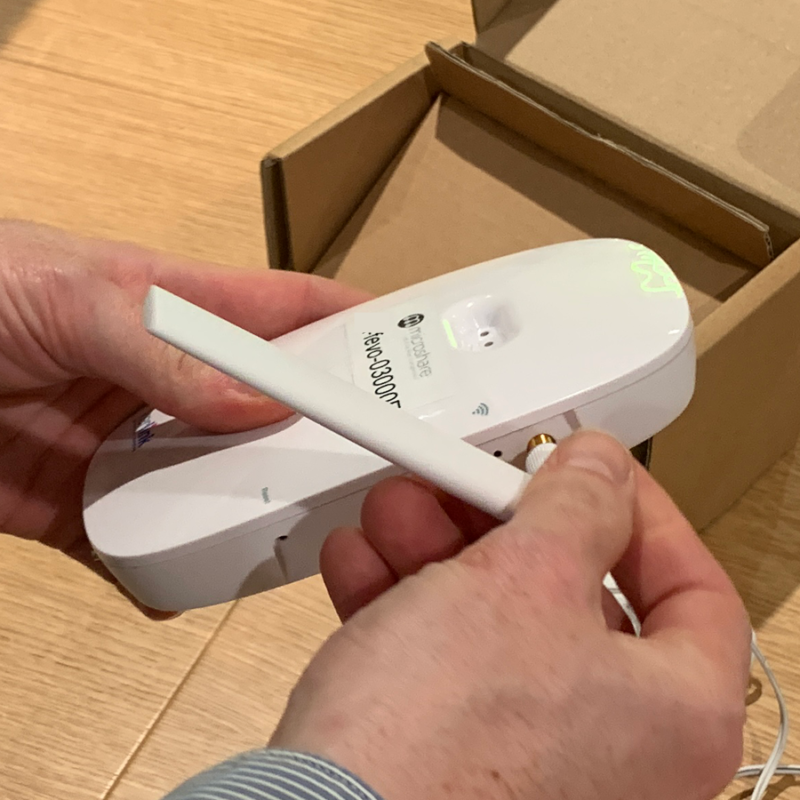
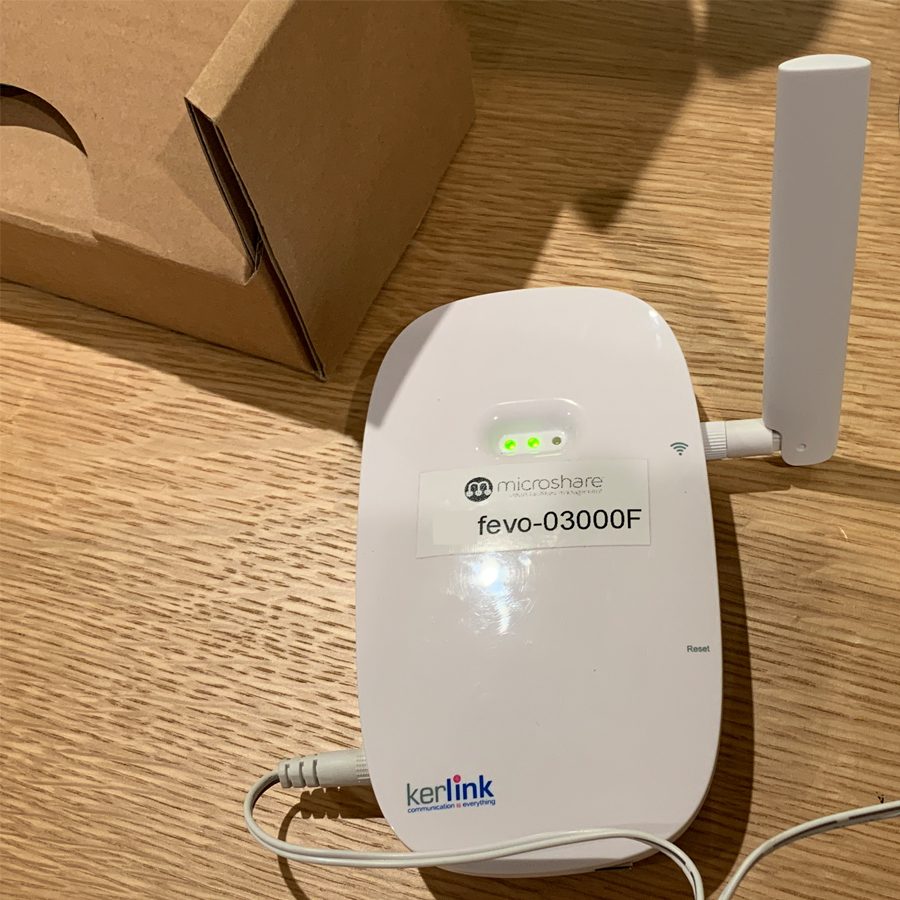
1. Unboxing the gateway
Remove all of the components from the box and remove all packaging from the devices. The box contains Indoor Gateway(s), device antenna(s) and power supply utility(ies).
2. Connecting the antenna
Screw the antenna to the gold connector on the right-hand side of the gateway.
3. Power the Gateway
Plug the power adaptor into the power socket on the gateway.

Plug the power adaptor into an electricity outlet (the LED’s on the device will be red, showing that power is on).
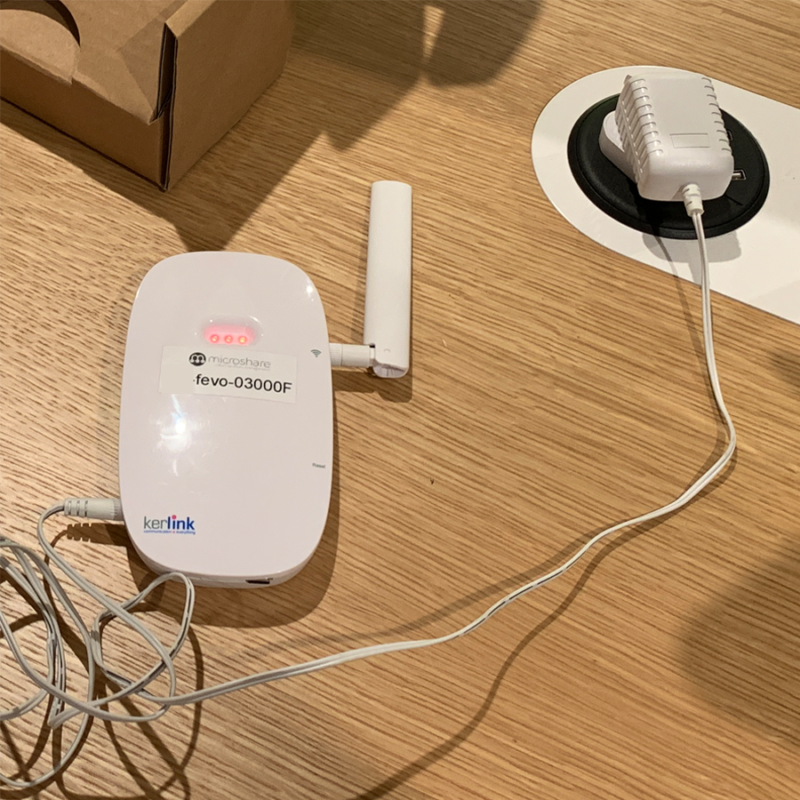
4. Connecting to your network
Plug a standard Ethernet cable with Internet access into your gateway.

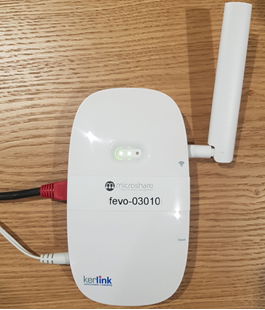
After 1-2 minutes, the two LEDs on the front will turn solid green, your LoRaWAN gateway is now up and running and your sensors can be deployed in your building.
Your all done!
Please email installation@microshare.io to indicate that your gateway is up and running, so that we can confirm at our end.
4A. Post Installation
In most cases when connecting to an existing network, the gateway should communicate immediately. If not, your network administrator may need to open the following Ports:
- Protocol: OpenVPN
- Port: 1194 UDP
- Protocol: ICMP
- (no port number required)
For additional security, the 2 above protocols can be restricted to our Server’s IP address:
https://microshare.wanesy.com/
You may also want to deploy our gateways on a dedicated VLAN for additional separation from your network.
4B. Installing your gateway using the preconfigured 4G backhaul option
As an alternative to deploying the Indoor Gateway on your existing network, Microshare delivers the Kerlink iFemtocell Evolution pre-configured with a 4G SIM card already activated. Be aware that certain applications such as Contact Tracing and Asset zoning require a very strong connection to the Internet and may not operate properly if 4G signal is not adequate where you install the gateway.
If using 4G, simply follow these steps:
- Connect the antenna
- Plug into a mains power source
- Wait 1-2 minutes for the SIM card connection to be established and the 2 LED’s will turn solid green to show connection is made.
You’re all done!
Please email Installation@microshare.io to indicate your gateway is up and running, so that we can confirm at our end.
Gateway appears offline - troubleshooting
1) Check the device is still installed at the set location
2) Are there two solid green lights on the gateway?
- If there are no lights, please check that the gateway is still connected to the mains via the cable provided.
- If there is one solid green and another flashing green or is solid red, that means the device is not connected to the network.
-If using cellular connectivity, check the SIM card is inserted properly (this can be found at the bottom of the device)
-If using Ethernet, check the ethernet cable is connected both to the gateway and to the router - If there are no lights, please check that the gateway is still connected to the mains via the cable provided.
3) You will know the issue has been resolved when there are two solid green lights on the device
4) If you are still experiencing issues – please contact our 24hr Support team at support@microshare.io